Towing safety requires recognizing potential hazards well in advance. From lane changes to backing into campsites, perhaps no aftermarket accessory improves navigational safety more than a vehicle observation system. For new RVers, an RV backup camera greatly enhances safety and security when navigating roadways and campgrounds. But is a Furrion RV camera the best option for adding backup or side-view monitoring to your camper?!
Benefits of the Vision S Furrion RV Cameras
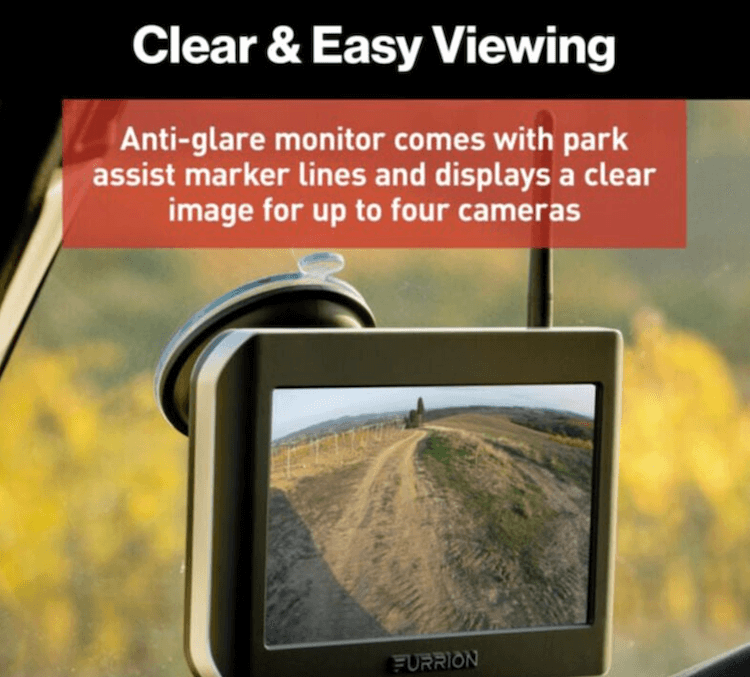
Furrion makes some of the industry’s best wireless RV backup cameras and side marker cameras. Their Vision S RV observation system comes with a backup camera, two side marker cameras with lights, and a 5” display monitor, giving you everything you need to install a complete vehicle observation system on your towable RV. The Furrion Vision S RV camera system is easy for all RVers to install, whether you are a beginner or an experienced camper.
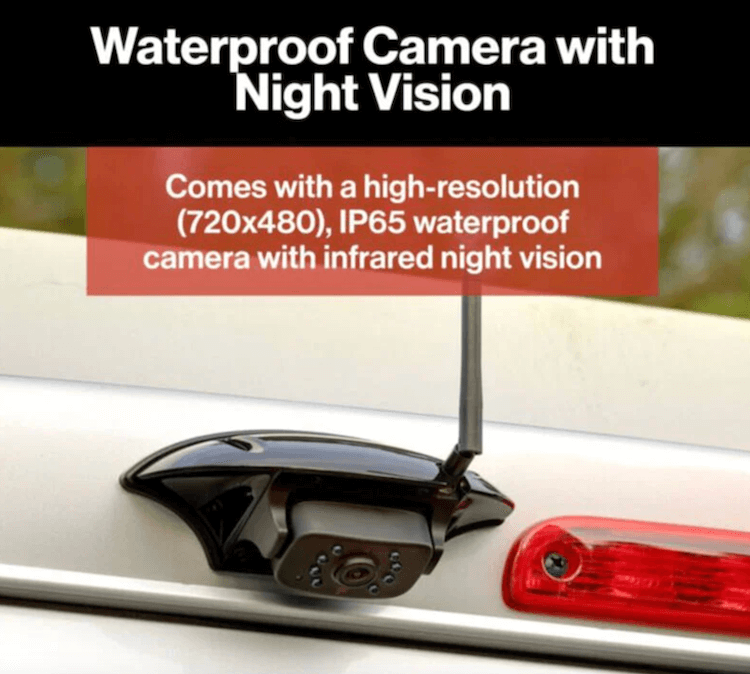
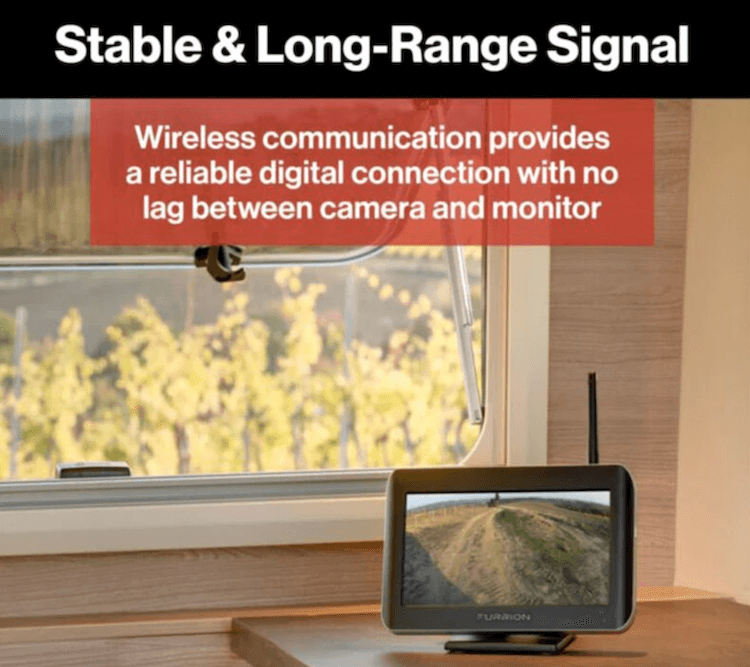
With wide-angle viewing, motion detection, and night vision settings, the Furrion Vision S vehicle observation system makes it so much easier to monitor what’s going on around your RV. It boasts high-resolution (720 x 480) cameras that wirelessly connect to the dash-mounted monitor for interference-free viewing.
There’s even an auto-wake feature that provides added security for your camper. Plus, the cameras are IP65 waterproof and include a microphone that makes it easier to hear your spotter’s commands instead of shouting at each other as you’re navigating into your campsite.
Shop Furrion Vision S using the links below:
Is Your RV Prepped for Furrion Cameras?
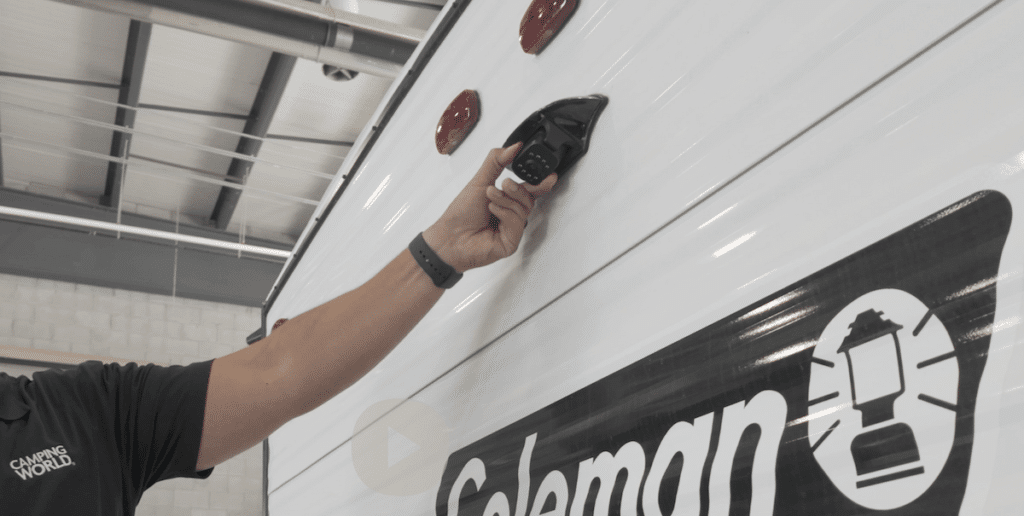
The good news is that you can install Furrion RV cameras for backup and side-view monitoring even if your RV isn’t prepped. The backup camera will likely replace one of the rear running lights at the top of the rear wall. The side-view cameras will replace the side marker lights on the sidewalls (as shown in the video below!).
However, the installation will be easier if your RV is prepped for backup and side view cameras. If so, the prep housing should be displayed at both camera locations. If unsure, consult your owner’s manual or contact the manufacturer directly.
Furrion Wireless Backup Camera Installation
With this easy Furrion Vision S installation, you get backup and side-view monitoring to ensure you never miss an obstacle that poses a danger to your RV investment. Let’s begin with the DIY Furrion wireless backup camera install steps.
Technician Tip: Before handling any RV wiring, remove a cable from your RV battery’s negative terminal to remove power from the system.
Prep Mounting Location
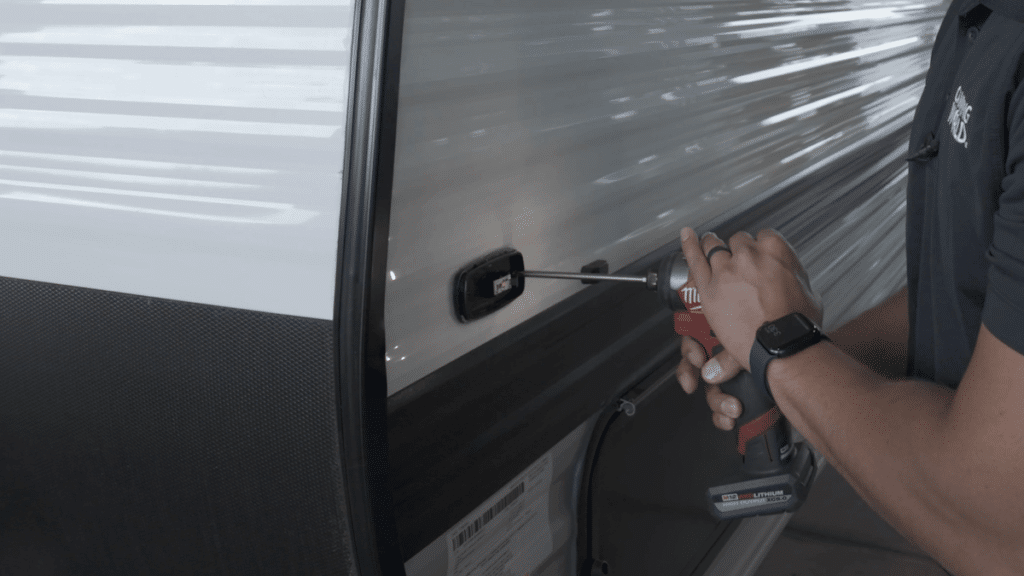
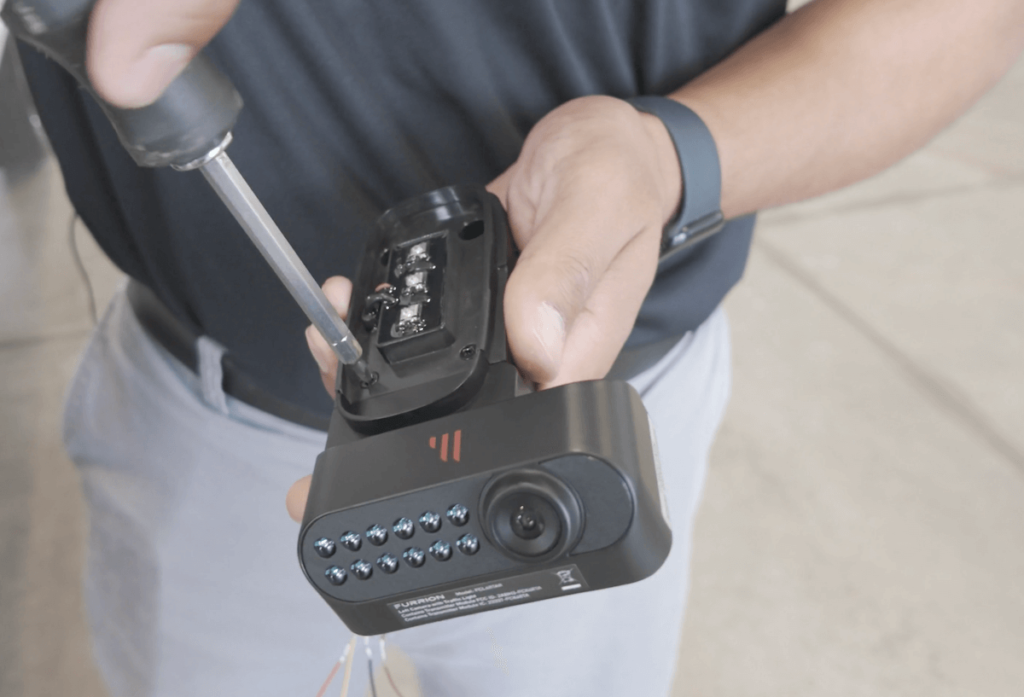
If your RV is prepped for an RV backup camera, simply remove the four screws holding the prep housing in place to ready the area for the camera installation. This will reveal the electrical connector for the camera.
If it’s not prepped, you’ll mount the new housing roughly two inches below the central running light. You’ll likely need to use that running light’s wiring to splice in the backup camera. However, you’ll want to replace the light and reseal the housing once the installation is complete to prevent water intrusion.
For non-prepped RVs, use the gasket on the Furrion camper camera to mark an outline for your mounting location. Then, use a ⅝” bit to drill a hole in your camper’s housing and back wall. If you haven’t already removed the light you’ll pull power from and disconnected the wiring, do so now. Then, route the female connector of the camera’s power cable through the running light’s opening and out through the ⅝” hole, leaving roughly 2” of slack.
You can then connect the other ends of the power cable to your 12V DC power supply, ensuring that all connections are secured with the proper electrical connectors and wrapped in electrical tape. Finally, use the self-tapping screws to mount the gasket and bracket to the RV’s rear wall. Apply sealant around the housing and screw locations to reduce water intrusion.
Connect and Adjust the Backup Camera
For a backup camera prepped RV, you’ll be using the housing that came installed on your camera’s rear wall. For non-prepped RVs, you’ll use the housing you’ve installed in the previous step.
Ensure the antenna is connected to the top of the new backup camera. Continue by removing the four screws holding the camera into the new housing that it came with. You can then plug the camera into the electrical connector and secure it in the prepped housing using the new screws. Adjust the camera’s viewing angle up or down to suit your preference.
Mount the Display Monitor
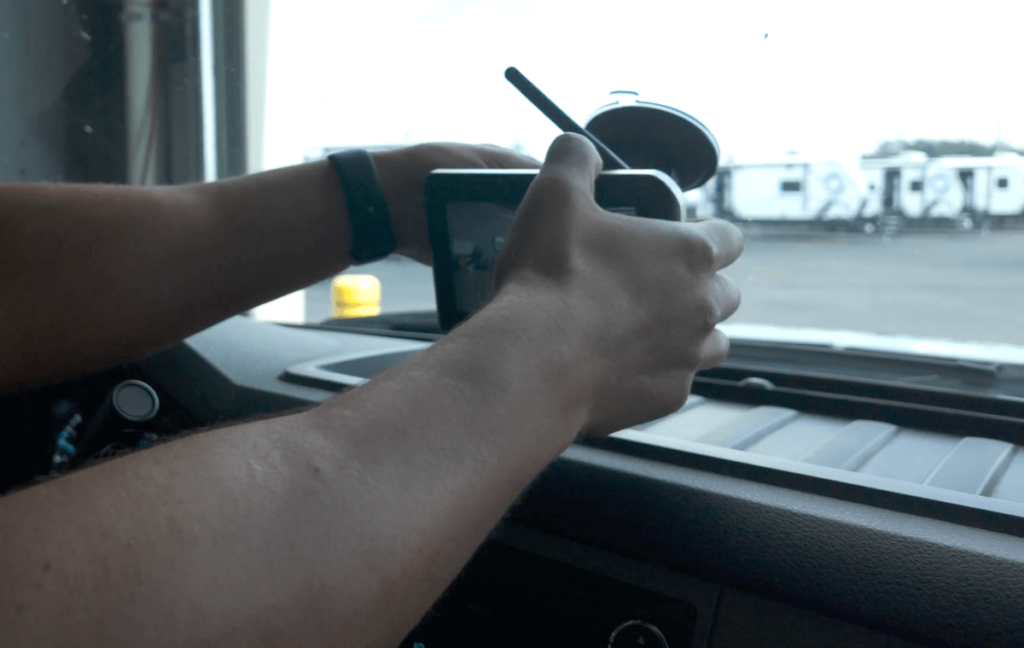
Whether you choose the Furrion RV camera system with a 5” or 7” display, you’ll have two mounting options: a suction cup for a windshield mount or a table stand for a dash mount. Choose your mounting method according to available space, preference, and local regulations to ensure your RV camera monitor doesn’t obstruct your view.
For a windshield mount, clean the mounting location before removing the plastic film on the suction cup and sticking it in place. Push the locking arm down to secure the mount to your windshield. For a dash mount, simply place the table stand on a flat, stable surface and route the display’s power cable through the hole in the vertical face of the mount.
Both methods then require the same following steps:
- Align the ball on the mounting bracket with the hole in the back of the display monitor.
- Gently push the display onto the mounting ball to lock it into place.
- Plug the 12V display power cable into a cigarette lighter socket in your tow vehicle.
- Connect the DC end of the power cable (opposite the 12V connector) to the power port on the back of the display monitor.
- You can adjust the monitor’s angle to your viewing preference. Most models also allow you to opt in or out of image mirroring.
Pair the Monitor with the Backup Camera
With the camera installed and the monitor mounted, you can restore 12V power to the backup camera by connecting the negative battery cable you removed before installation. Then, follow these steps to pair your Furrion wireless backup camera to the display monitor.
- Select MENU on the monitor to enter setup mode.
- Press PAIRING and select the camera you wish to pair.
- Choose MONITOR PAIRING to complete the sync.
Technician Tip: If you install Furrion Vision S side cameras (following the instructions below), you’ll repeat these steps to sync them once their installation is complete.
Furrion Side Camera Install Guide
Side marker cameras dramatically increase your visibility when towing. They’ll make lane changes and getting your RV close enough to campsite hookups easier. If your RV is prepped for Furrion Vision S side camera installation, the process requires five basic steps:
- Remove the lens cover and detach the original “prep” from the side marker housing on your RV.
- Remove the lens cover on the new Furrion side marker housing and detach the new camera.
- Install the new camera into the side marker prep.
- Repeat Steps 1-3 for all side marker cameras you wish to install.
- Sync the cameras to your in-vehicle display monitor.
However, a Furrion Vision S side camera can also be installed on non-prepped RVs. Here’s how:
Technician Tip: Before handling any RV wiring, remove a cable from your RV battery’s negative terminal to remove power from the system.
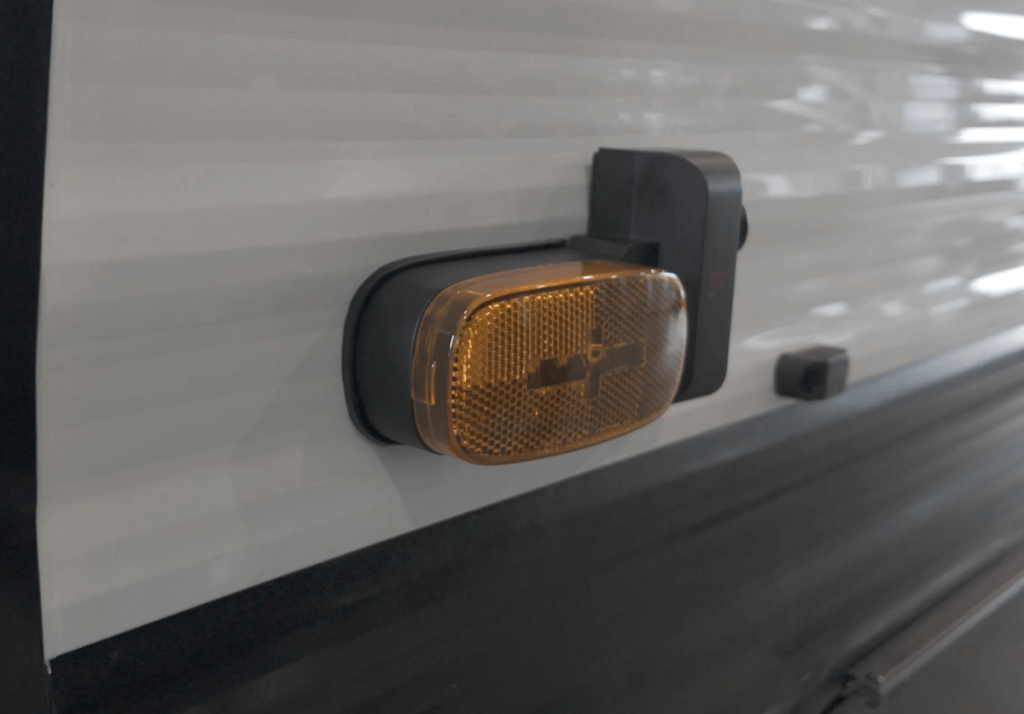
Remove the Side Marker Light
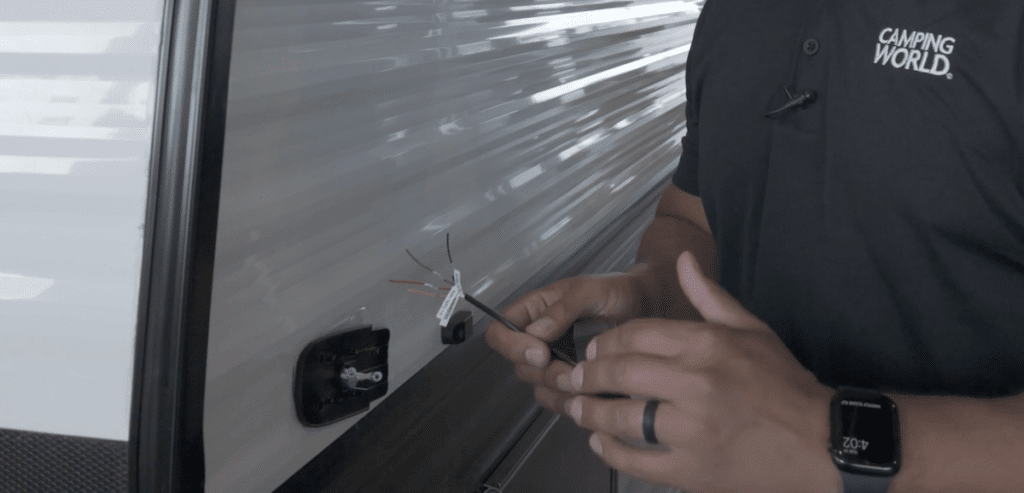
Use a utility knife to separate the original side marker housing from the RV’s sidewall by carefully cutting between the sidewall and the RV lap sealant that guards the original housing against water intrusion. Be careful not to damage the aluminum or fiberglass RV siding. Then, carefully remove the lens cover and the two screws holding the housing to the RV. You may need a flathead screwdriver to help gently peel the housing away from the sidewall.
Prep Electrical Connections
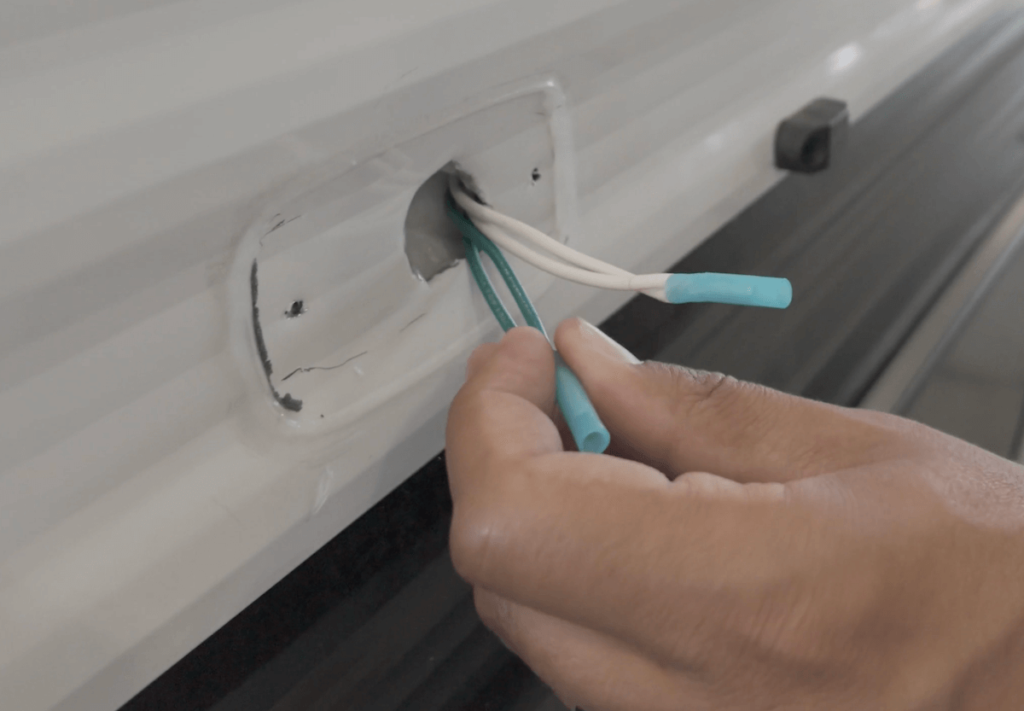
Gently pull the electrical connections for the side marker light out of the revealed hole under the housing. The edges of the exposed hole may be sharp, so use care during this step. You can then cut and strip the wires to expose enough copper cable to make new connections to the Furrion Vision S side marker camera.
Identify power and ground using a volt meter. Depending on your RV’s wiring diagram, you may have multiple wires for each. Since the Furrion side cameras will have a single wire each—one for power, one for ground—you may need to connect multiple cables from your RV, installing a butt connector on each set of wires to complete your side marker wiring prep.
Prep for Side Marker Installation
Remove the housing gasket from the Furrion side marker camera and feed your prepped wiring through the gasket’s central hole. Your RV’s electrical wires MUST run through this hole BEFORE they are connected to the marker camera’s wiring. You can then remove the lens cover from the new marker light and the two screws holding the camera body onto the marker light housing. Remove the camera body and set it aside for now.
Connect Side Marker to Electrical
Check that your marker light is oriented correctly, with the camera plug-in facing towards the rear of your RV. You can then connect the camera and marker light’s wiring to your prepped electrical connections. Each housing will come with four labeled wires: power to the light, power to the camera, ground, and power to the trigger signal (left or right or hazard lights).
For travel trailers, you’ll twist the wires for the power to the light and power to the camera together and connect both to power coming from your RV. You’ll then connect ground to ground and leave the trigger signal disconnected. You can then slide the camera body back into the marker housing.
Technician Tip: The trigger signal wire is designed for motorhomes, where the side camera will automatically be activated when the driver turns on a left or right turn signal. However, most travel trailers aren’t wired for this activation.
STOP! Before continuing, move to the other side of your trailer and complete the above steps for the second side marker camera.
Test Marker Operation
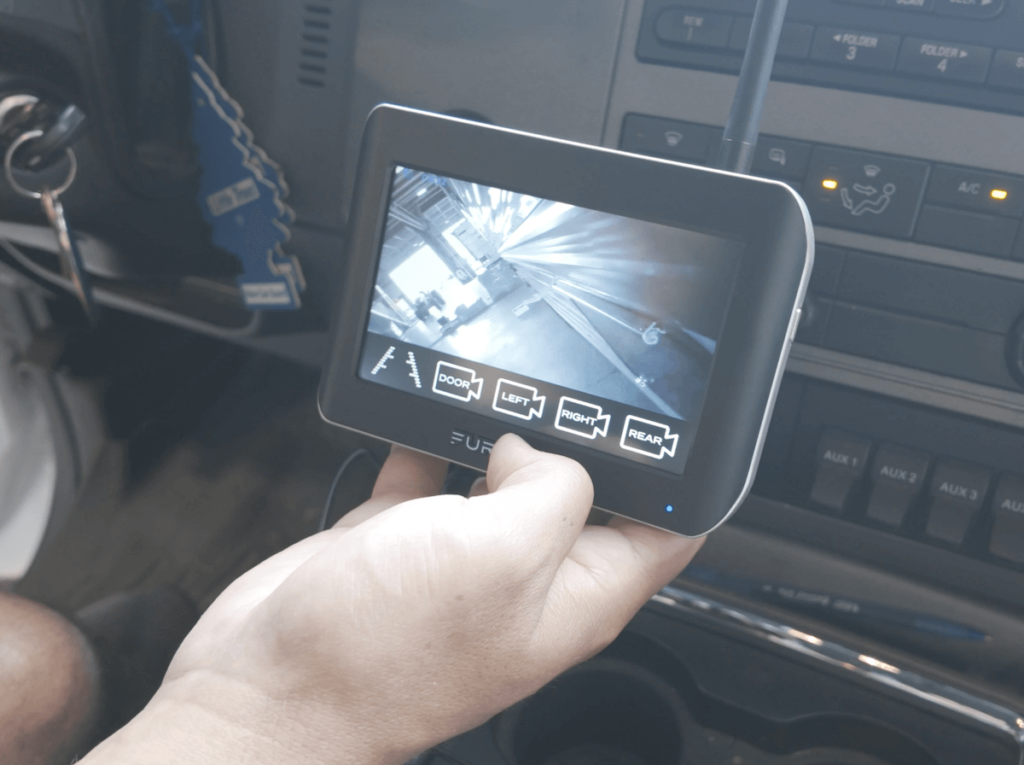
Before finalizing your installation, head to your display monitor and follow the syncing instructions above to pair your new side camera with your display. Turn your vehicle’s running lights on and check that your side cameras feed accurate video data to the display before continuing.
Finalize Installation
With testing complete, follow these steps to complete your Furrion Vision S side marker installation:
- Use electrical tape to insulate all electrical connections. Remember to tape off the trigger signal connections if they aren’t used for your application.
- Remove the camera body from the side marker housing.
- Push wiring back into the RV sidewall and use self-tapping screws to secure marker housing. Tighten with an impact driver three-quarters of the way before using a handheld screwdriver to fully tighten, helping to avoid stripping the screw holes.
- Reattach the camera body with the two screws and gently push the lens cover back into place.
- To prevent water intrusion, use approved lap sealant to seal the top of the side marker housing and camera body.
After completing these steps for the cameras on both sides of your RV, head back into your tow vehicle to check that all cameras are showing accurately on your display. You can also consult the Furrion Camera Manual for tips on pairing, troubleshooting, and more.
Hopefully, these tips help you with your Furrion Vision S installation. But if you don’t feel comfortable installing this backup camera or you need assistance troubleshooting issues, contact our Service Department.
Here are a few other RV upgrades to make your RV safer and easier to tow:
- Do You Need a Backup Camera for RV Trailer?
- Trailer Life Pathway Wireless Backup Camera
- Is TravlFi Your Ideal RV Internet Solution?
- Is the Echo Brake Controller the Easiest RV Upgrade?
Have you installed a Furrion RV camera on your camper? Let us know what tips you’d share with others in the comments below!


The original camera was doing the same thing, but it only came on occasionally. We had an RV repairman come out and replace a part, but that did not solve the issue. We’ve been trying to find information and the closest we could find is something to do with an electrical change made on 2021 ignition system. Called Furrion and they suggested an alternate power source. Tried hardwiring to the battery and using an external power source. The only time is worked correctly was when we hooked it to my car. It is the Vision S RV Observation System.
Hi Kathy!
Sorry for the delay. Here’s what I learned from our Technical Service Team:
It sounds like you’ve installed the new camera in place of the original which was part of a different hardwired system. Our first step is to determine where you pulled power from for the new camera. Let’s assume the power wire from the old camera that is being used for the new camera is coming from the old monitor system instead of the running lights or a constant 12VDC power source.
If that’s the case, the old system provides power when with the ignition off as a security camera feature. When the ignition is on, the camera is only powered when the RV is in reverse so the monitor is reading “Signal Lost”. This is so the monitor is not a distraction while driving. The monitor is not the issue as it still has power or it wouldn’t be able to display that statement.
Let’s try setting up the monitor in the RV as normal, but power the camera either with a stand-alone battery or by rewiring the camera into the running lights or a fused 12VDC wire from the batteries. If you wire to the running lights, you cannot use it as a security camera when parked, while running a dedicated power line will. When using a dedicated power line, the camera will always draw current so the fuse should be removed when the RV is stored. In any event, this should resolve the issue.
You can also reach out to our Technical Service hotline directly at 1-866-838-5304.
Hope this helps!
We installed and paired exactly as described on our 2021 Integra Vision 28S. Everything worked perfectly until we turned on the vehicle. Then we got error message “no signal”. We tried plugging it into my (older) car…worked perfectly. No one seems to know a fix for this. Any suggestions?
Hi Kathy!
Was the original backup camera on your motorhome no longer functioning? Was this a replacement for the original equipment?
I’m seeing that the manufacturer states that model year came with a backup camera, so trying to learn a bit more about the system you have. It’s possible the new Furrion camera (which model, by the way?) is not an OEM-compatible replacement for the camera your RV came with, but it’ll be hard to say for certain without more information.
Thank you!