RV CONSTRUCTION AFFECTS EVERYTHING — safety, how long your RV lasts, towing performance, temperature control, maintenance, overall durability, etc. It’s what defines a quality RV. But there are many ways to achieve this, and simply paying more isn’t a guarantee. Different RV construction methods serve different needs—and different budgets. Good and not-so-good construction shows up in every RV category.
No matter the size, style, or price point you’re considering, understanding how an RV is built—and how well it’s put together—is just as important as choosing the right floor plan. An RV’s construction, systems, and serviceability should carry as much weight as its decor, features, and overall first impression.
So when you’re considering an RV, no matter its size, trim, or the construction methods used, here are a few ways you can evaluate its build.
Key Takeaways
- Prioritize Hands-on Inspection: Don’t rely on price tags or brand names; physically test the craftsmanship by checking for things like firm floors, square door frames, and consistent wall lamination to ensure the camper is “road-ready.”
- Test Systems and Serviceability: Insist on powering up critical systems to verify they function correctly, and confirm that critical plumbing, propane, and electrical components are easily accessible for future maintenance.
- Match the Build to Your Reality: Ensure the RV’s fully loaded weight is within your vehicle’s tow ratings, and that the insulation and suspension are specifically designed for the climates and terrain you plan to visit.
Is It Ready?
In my opinion, there’s no substitute for touring RVs in person—though you can learn a lot about a manufacturer behind the scenes. It’s not the only way to buy an RV, but visiting a dealership or buying a used RV privately offers the unique chance to walk through the RV you plan to buy.
Touring RVs in person is the best way to see, touch, and test before you buy. Sure, RV reviews can help, but standing inside an RV lets you feel if the space will meet your camping needs. If you have this opportunity, there are a few things to keep in mind.
While almost all RVs go through some form of inspection—some of which are significantly stringent—your buying decision ultimately comes down to whether you feel an RV on the lot is ready to buy. We can throw around terms like “fit and finish,” but it makes a difference knowing where and what to check, and why.
And you won’t notice areas where fit and finish don’t quite meet your standard with a quick walkthrough. You have to touch, check, open, and close—everything. Whether you’re in a luxury fifth wheel or a stick-and-tin trailer that’s a bargain deal, your observations matter.
Here are some quick checks you can use whenever you tour a new or used camper:
Open and Close Doors & Windows
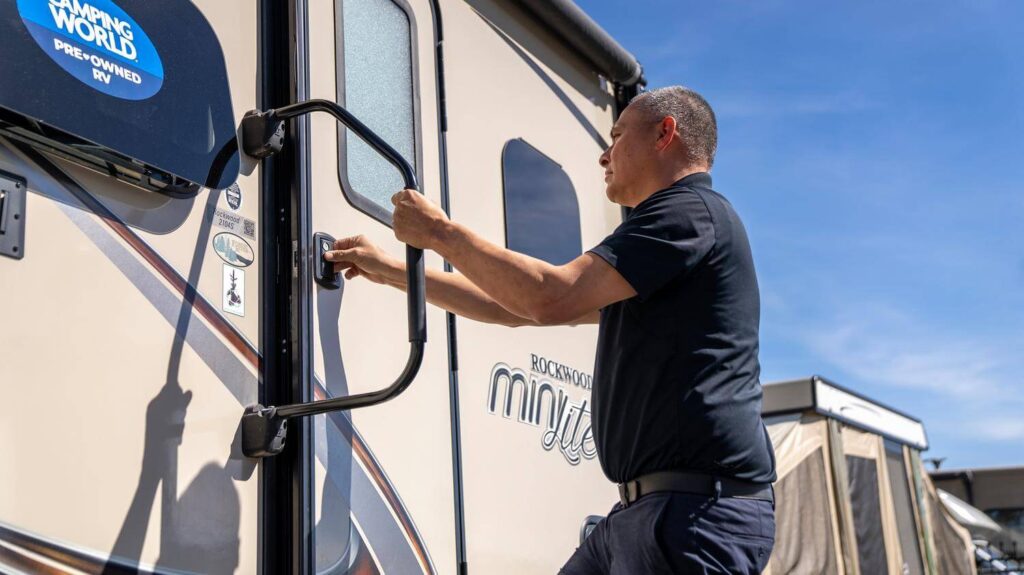
Sounds simple enough, right? An RV is essentially a house on wheels, and when a door won’t close easily, it’s often a sign something’s out of alignment—whether that’s the leveling, the frame, or the latch itself. Do the doors open and close smoothly, latch cleanly, and seal without forcing them? Contrary to what you’ll see and hear in many campsites, RV doors are not meant to be slammed. They should latch and seal with a gentle push, and the locks should engage with ease. Don’t forget to open the windows, too, ensuring they slide or swing open easily and latch completely when closed.
Walk the Floors
Soft floors are a major red flag, and some of the most common places for soft spots are in slide rooms, around floor registers for the heating system, or at seams. Especially for plywood floors, imagine the places where two 4’ by 8’ sheets of plywood come together beneath the vinyl flooring or carpet. Are these seams reinforced to prevent soft spots or sagging? Do they feel firm, or spongy and bouncy in spots? Even if the salesperson looks at you sideways, take your shoes off and really get a feel.
Open the Cabinets and Drawers
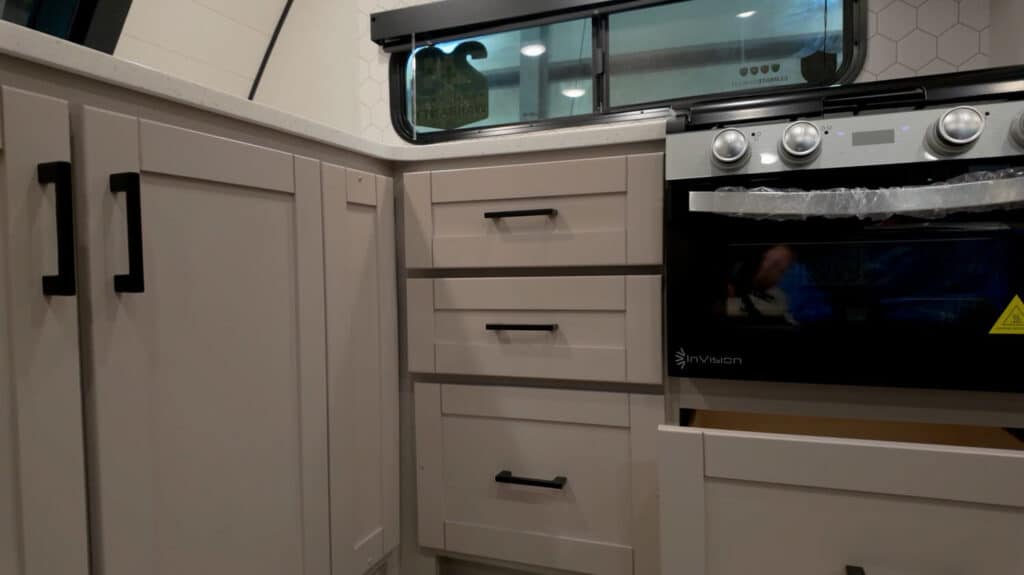
Many RV manufacturers pride themselves on their drawers and cabinets. It’s a simple way to improve the camper’s experience. From soft-close designs to full-height drawers, there are many small but thoughtful additions that indicate a manufacturer has taken the extra step for the customer. Likewise, it’s easy to see when quality isn’t quite up to snuff.
Cabinet doors should be mounted so the gaps between them look even from top to bottom—no crooked doors! Test that they easily swing open and note the security of the hinges—heavy-duty, hidden hinges are generally a sign that the manufacturer didn’t skimp on cabinet hardware.
For drawers, do they open smoothly and latch securely? Did the manufacturer give you an 8” deep drawer when there was clearly room for a 12” drawer that offers more storage? Are the drawer latches or magnets strong enough to keep them secure while you’re bouncing down the road?
Technician Tip: In many cases, a quality RV drawer requires a bit more force to open than your home drawers. It’s a sacrifice that we make to ensure our kitchen cutlery doesn’t wind up all over the floor when we hit a speed bump a bit too fast.
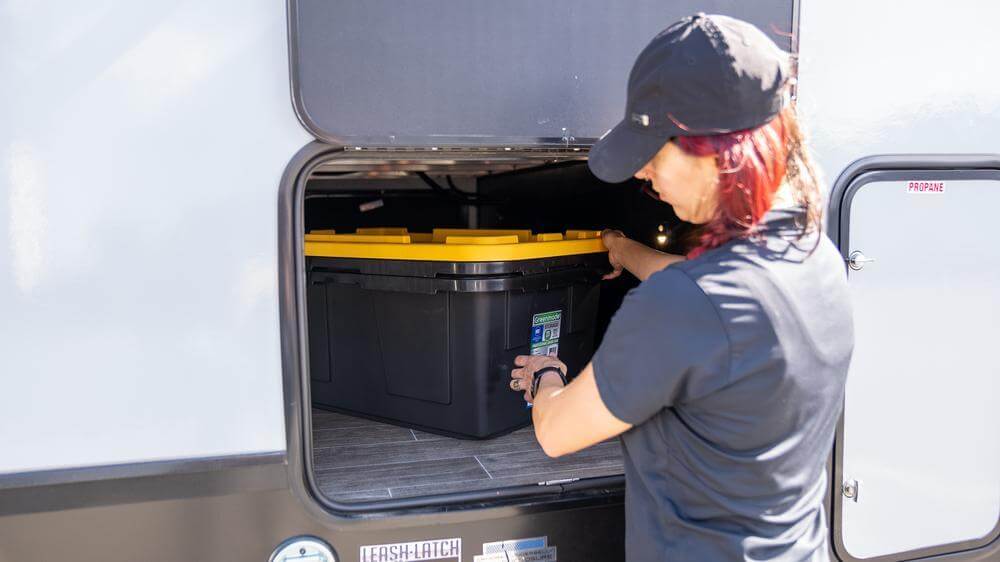
Evaluate Other Storage Access
Whenever I walk through a Rockwood or Flagstaff RV, I always make a point of mentioning the under bed storage. Unique to these brands, every bed is built with an aluminum frame that matches the strength of the RV’s actual structural frame. It demonstrates the integrity these brands put into their storage, and it’s a helpful lesson to those learning how to evaluate RVs.
Access to under bed storage and the quality of exterior baggage doors are often overlooked. For the storage area under most RV beds, did the manufacturer make it easy to access by installing lift-assist struts? While the bed platform is lifted, note the structure of the bed frame. Not all manufacturers include an aluminum frame under the bed, but you can also note the size, wood quality, and number of vertical supports in the bed’s frame to evaluate its overall robustness. Additionally, check for covered hinges (added weather resistance) and slam latches (better security and reduced maintenance) on exterior storage doors.
Check the Walls and Roofline

On all RVs, bulges or waves can signal factory construction defects (e.g., defects in the lamination process or screws/rivets not secured to the framing) or issues caused by aftermarket installations (e.g., incorrect screw length used to install an interior TV mount). This happened to me on a used trailer I bought, eventually leading to compromised exterior aluminum paneling. It’s an important part of your inspection and doesn’t take much to explore.
Inside, gently knock or push on the walls to feel for the vertical studs and note the distance between them. Less distance between studs can signal a more robust underlying structure. Outside, look down the exterior walls from the corner. You’re looking for a flat, consistent surface, free of bulges, waves, or bubbles. Bubbles on laminate trailers are an early sign of delamination issues.
None of these checks requires tools or a technician’s background. They’re simply ways to answer that first big question: Does it feel ready for camping? You’re checking floors, walls, cabinet alignment, seals, doors, windows — it’s the “can I trust the craftsmanship?” layer.
Is It Ready to Work?
Even the best-looking RV will leave you frustrated if the systems don’t actually work the way they’re supposed to. We’re talking about the A/C powering on and blowing cold air, the furnace actually circulating warm air, the water pump supplying adequate water pressure, every outlet working when you plug in a cable, and so on.
It’s a simple step that many RVers miss—though not without good reason.
Here’s why: the tricky part about looking at RVs on a lot is that most won’t be plugged into shore power. This makes it challenging to truly test if an RV is ready to work—most of you likely don’t wheel a portable power station around while RV shopping!
Most dealerships will happily hook an RV to shore power or bring over a jumper box if you ask. And you should ask. You’re not being pushy—you’re making sure the RV functions.
Conversely, you may only have the chance to explore the RV with full power during your final inspection before signing paperwork. Do not rush this process by letting the excitement of a new RV distract you from being thorough.
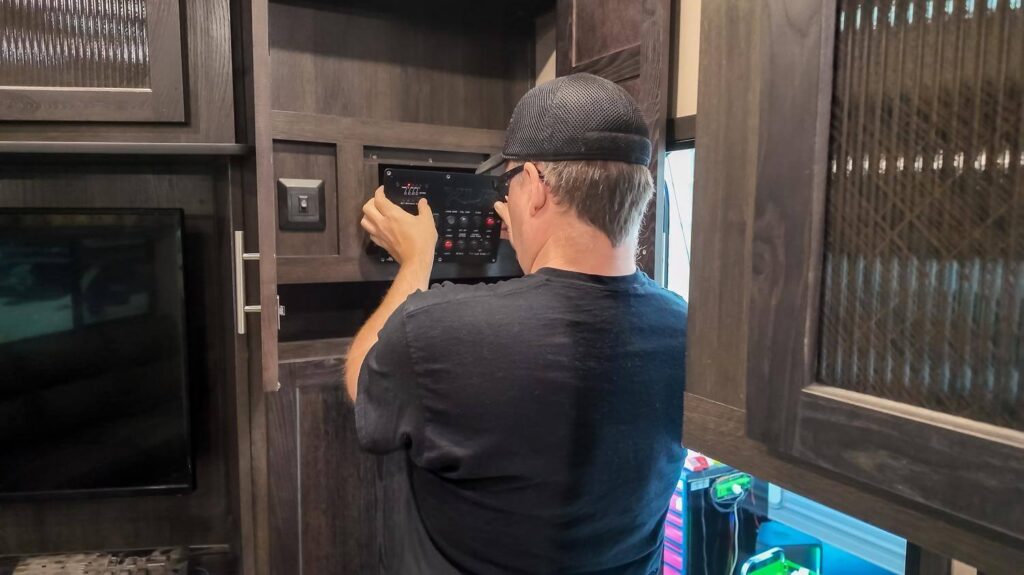
This is your moment to understand the RV as a complete system. Make sure you know which systems should be tested—electrical, plumbing, propane, HVAC, appliances, leveling, and slide mechanisms—and confirm that each one operates as intended. Make sure you understand how they work. Where are the shutoffs? How do you switch power sources? What requires maintenance?
The good news? A technician or delivery advisor should walk you through this stage. If someone doesn’t volunteer, ask for help. This is your opportunity not just to confirm functionality, but to leave confident in how your RV actually operates.
Once you’ve got power, here’s what to check:
Technician Tip: Start by turning on the refrigerator. This allows it to start cooling while you’re performing other checks—you’ll come back to it later. Additionally, you can also turn on the water heater if it isn’t a tankless model. It doesn’t matter if you start with the gas or electric heating function for DSI water heater testing, but the water in the tank will need time to warm up, so starting that process while you check other systems will make your test more efficient.
Lights

Turn on every light you can. It’s simple, but it goes a long way. Do they all work? Is there flicker, delay, or inconsistency in brightness? Do they dim noticeably when other systems are running?
Inconsistent lighting can point to loose connections, undersized wiring, weak grounds, or a system that wasn’t fully tested before delivery. If puck lights have individual push-button switches, check each one along with the wall switch they’re tied to. Loose-feeling switches, uneven brightness, or sloppy cutouts around fixtures don’t just affect aesthetics — they can signal rushed electrical work behind the walls.
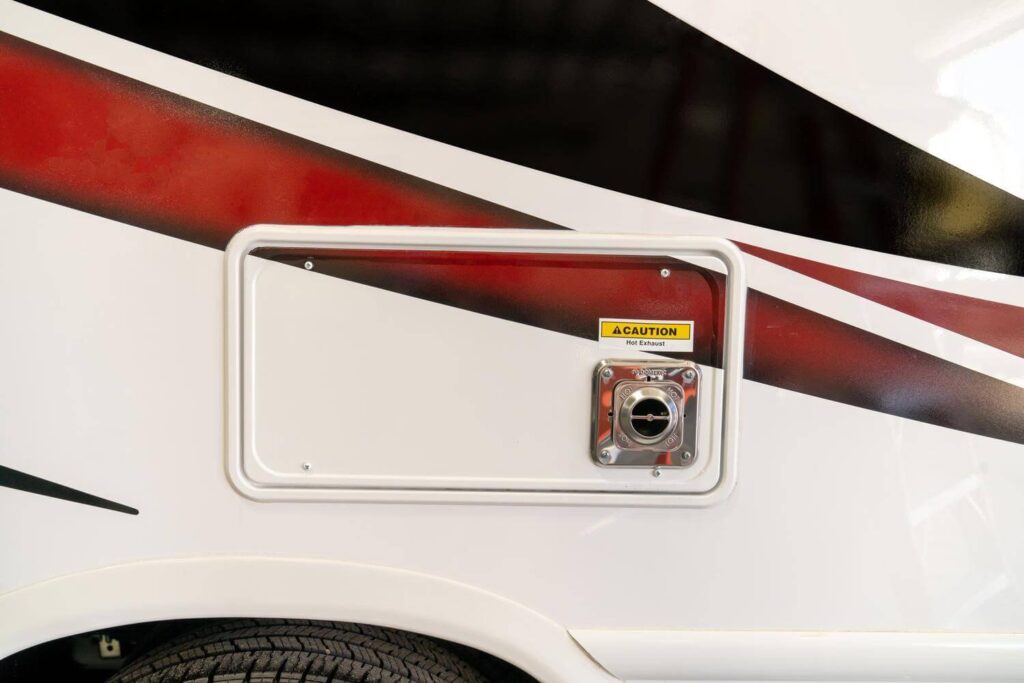
Heating and Cooling Systems
You’ll want to test the heating and cooling systems individually. Because these systems are complex, repairs can be both costly and time-consuming. That time gets extended if a warranty claim becomes involved. So, checking that the furnace actually produces warm air and the opposite is true of the air conditioner can save you from discovering an unfortunate truth on your first camping trip.
Start by turning on the air conditioner and/or adjusting the thermostat down to a temperature below what it’s currently registering as the ambient temperature inside the RV. You want to hear the compressor kick on, not just the fan. Do this first, so you can give it time to draw cool air while you check the operation of another cooling system component: vent and/or ceiling fans. After a few minutes, place your hand under each register to check that you’re actually feeling cool air. Don’t forget to check the quick-cool register directly under the air conditioner’s interior ceiling panel.
After a satisfactory A/C test, turn the air conditioner off, and turn the furnace on and/or adjust the thermostat to a higher temperature. Listen for the following sequence: fan → click → ignition → heat. Some RVs will only have a single heat register, while others have multiple. In either case, you’ll want to confirm that warm air is coming out of all registers.
Water & Waste Systems

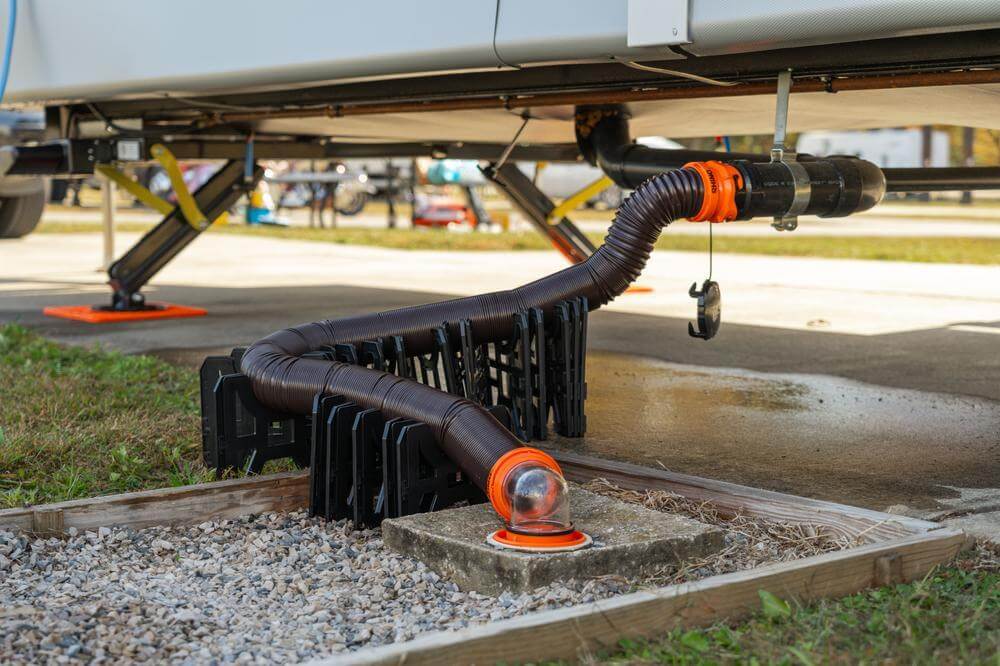
Images by Camping World
There’s arguably nothing worse than connecting to city water at your first campground and immediately hearing water leaking somewhere it shouldn’t be. The same is true of your waste system. Checking these systems now will prevent you from finding unexpected, and quite frankly unsanitary, leaks on your first trip.
After checking with the technician that the RV has at least several gallons of water in the fresh water tank, you can perform a basic systems check on the waste and water systems.
Flip on the water pump and, if you haven’t already done so, turn on the water heater. You should hear the pump prime, then quiet down. Rapid pulsing or continuous running can indicate leaks or air in the system.
Check:
- Faucets
- Shower sprayer
- Toilet flush
- Outdoor shower
- Outdoor kitchen
As hinted at earlier, this is where you’ll come back to test the hot water. If the camper does have a tankless water heater, you’ll want to test that it automatically turns on when the hot side of all faucets and showers is opened.
If you want to be especially thorough, you can now turn the water pump off and ask that the RV be connected to city water. You can then double-check all these systems to ensure they work the same.
Because you’re running water through the system and into the holding tanks, this also helps you—and your technician—double-check for leaks at water fittings or within the wastewater system.
Slides
Regardless of the slide room type, manufacturing defects sometimes happen. We’ve seen crooked slide rooms, incomplete seals, failure to hook up wiring to the motor, and other issues. But a slide room that doesn’t extend and retract smoothly can be indicative of a larger problem.
Run each slide all the way out and all the way in, checking for a smooth, even motion. Slow down and ask questions if you see jerky movement, uneven travel, or hear a loud grinding noise.
When fully extended, head outside to visually inspect the seals around the outer edges of the slide. These rubber seals are critical to keep water from entering the coach. Once retracted, return and re-check these seals.
Stabilizers (or Leveling System) & Jacks
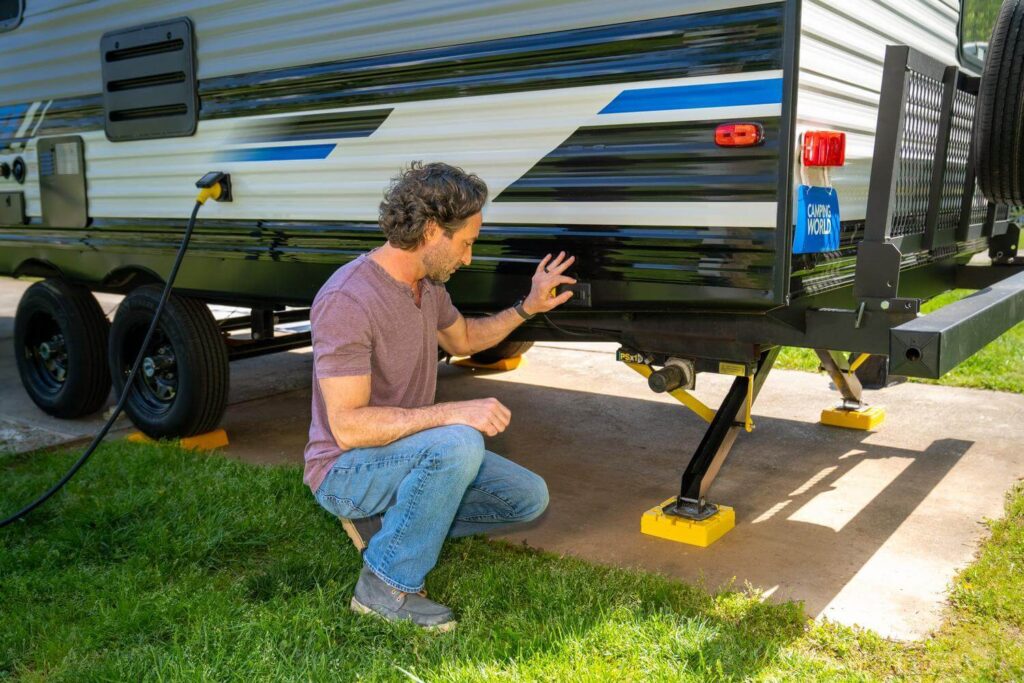
Potential issues with stabilizing and leveling systems range from the simple—such as insecure mounting on the underside of the chassis—to the complex—such as improper wiring or defects in the hydraulic system. Simple issues can likely be remedied on site, but catching more complex ones will save you from having to return to the service center sooner than you’d like.
Head outside to check your stabilizing (or leveling) system and tongue jack. Make sure all stabilizing jacks or landing legs extend and retract without struggling. Hydraulic systems should feel confident, and electric stabilizers shouldn’t scream or hesitate.
Because there are many types of RV stabilizing systems, use this opportunity to ask your technician whether there are any special operating procedures or safety protocols you should follow with this specific system.
Appliances & Outlets
Proper appliance and outlet operation depends on the other critical systems in your RV—electric, water, and propane. Many are the “end of the line” for those systems, so testing helps ensure they are functioning properly.
Return inside and individually test what you can:
- Microwave (first making sure there aren’t any manuals or other components inside!)
- Stovetop (testing all burners!)
- TV(s)
- Fireplace(s)
- Refrigerator (has it cooled down while you’ve performed these other checks?)
Additionally, grab your phone charger and test every outlet. This includes the standard 120-volt AC outlets and any USB outlets available, which are now very common in new RVs. Loose outlets or dead sections of the RV can hint at deeper electrical issues.
Because so many new RVs are also made with inverted or surge-protected outlets, you can also test them when disconnected from shore power (provided the RV is also equipped with an inverter and not just prepped for one).
What’s Worth a Professional Inspection?
Here are a few things that should make you pause:
- The A/C fan works, but the compressor never kicks on
- The furnace fan runs, but never ignites
- Slides start/stop repeatedly or lean to one side
- The water pump runs constantly
- Lights flicker as you turn more things on
- Jacks drop unevenly or won’t retract
These can be early warning signs — not always deal breakers, but definitely worth digging into. Because you’re ideally conducting this walkthrough with a technician, they can note issues that arise during the inspection, ensuring they are remedied before you drive or tow the camper off the lot.
When everything powers on, moves smoothly, and behaves the way it should, you can feel more confident that your RV is ready to work when you reach your first campground.
Is It Ready To Be Worked On?
Even the best RVs will need maintenance at some point—and some are a lot easier to service than others. Ease of maintenance will impact your ownership experience, from your confidence in performing a DIY repair versus taking it to a shop, to how long diagnostics and repair might take, to the likelihood of experiencing future issues once fixed.
Ultimately, your ability to service your RV more easily will save you money and extend its lifespan.
Access Panels
Some RVs make it easy to access critical components like furnaces and plumbing with simple wall panels or lift-up hatches. Others bury components behind glued panels or inside finished cabinetry. If everything important is hard to reach, repairs will be harder, slower, and more expensive.
Start by identifying access points to critical components, such as your water pump, water heater, electrical converter, refrigerator, and water lines. The more of these you can reach within storage compartments, under dinette or bed bases, or behind easily removable access panels, the better.
Wiring
Sloppy wiring in the areas you can see usually means even sloppier wiring in the areas you can’t. Take a look at any wiring that you can lay eyes on. Common areas where RV wiring is left exposed include the pass through storage compartment, behind drawers, and under the sink.
Here’s what you’re looking for:
- Clean routing (look for sharp edges, pinch points, etc.).
- Color-coded wires
- Labeled connections
- Nothing dangling or excessively loose.
Plumbing

Checking plumbing quality is similar to inspecting wiring. There’s only so much you can see visually when an RV is finished. However, you can check under sinks, see how hot and cold water lines are run, and look at waste system plumbing runs. You’re looking for:
- Supported, secured plumbing
- No kinks, sharp bends, or lines rubbing on metal
- Sealed penetrations where pipes pass through walls or cabinets
This is basic stuff, but it speaks volumes about the RV’s build quality.
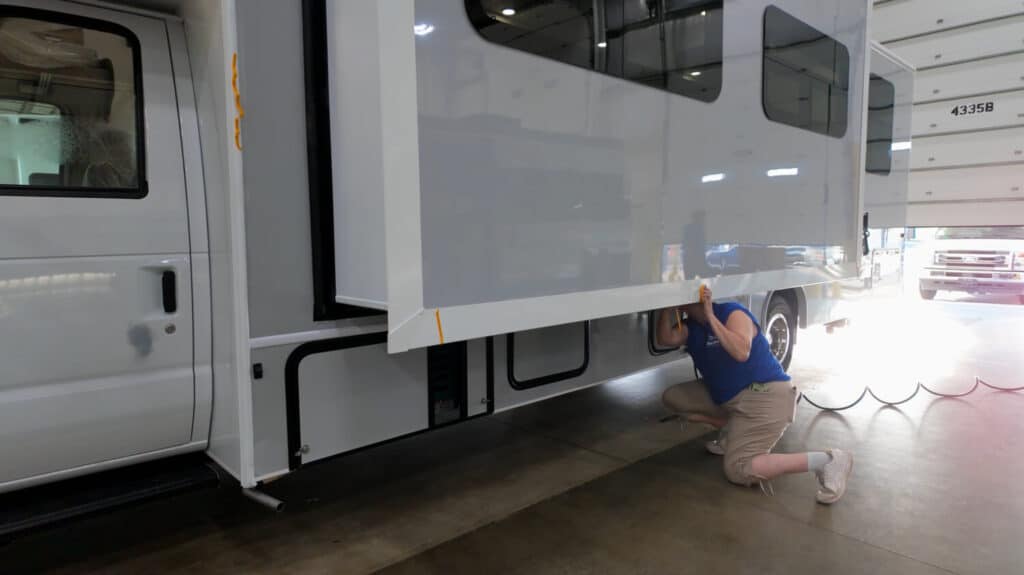
Underbelly
The underbelly of an RV protects all its critical systems, so it’s worth a quick peek, even if that means lying down on your back in the parking lot.
An enclosed underbelly provides better insulation, protection, and fewer critter problems. But here’s the thing: Is it accessible? Some underbellies are fully sealed with no access points. Others use sectioned panels that you can drop individually. Techs love those. A sectioned underbelly usually means easier servicing of tanks, valves, and heat ducting when needed.
Slide Mechanisms
Regardless of the type of slide mechanism in an RV, you can decrease future troubles by ensuring easier access. Ideally, you can identify the location of the slide hardware and/or motor(s). You’re checking for accessible parts, not a slide that’s boxed in so tightly a tech has to dismantle cabinetry or remove decorative fascia just to reach the motor.
Schwintek, rack-and-pinion, cable, hydraulic—all of them can work great when they’re installed with serviceability in mind.
Easier-to-service RVs spend less time in the shop, cost less to repair, and leave fewer opportunities for mistakes during maintenance. All of that adds up to an RV that simply lasts longer. Serviceability is a core part of construction, so taking the extra time to make these checks not only makes sense but can also save you many cents in the long run.
Is It Ready For You?
Many RVs are perfectly solid, fully functional, and easy to service, but still aren’t the right match for your tow vehicle, the people you want to camp with, or the adventures you want to take.
This is where you zoom out and look at the bigger picture:
Towability
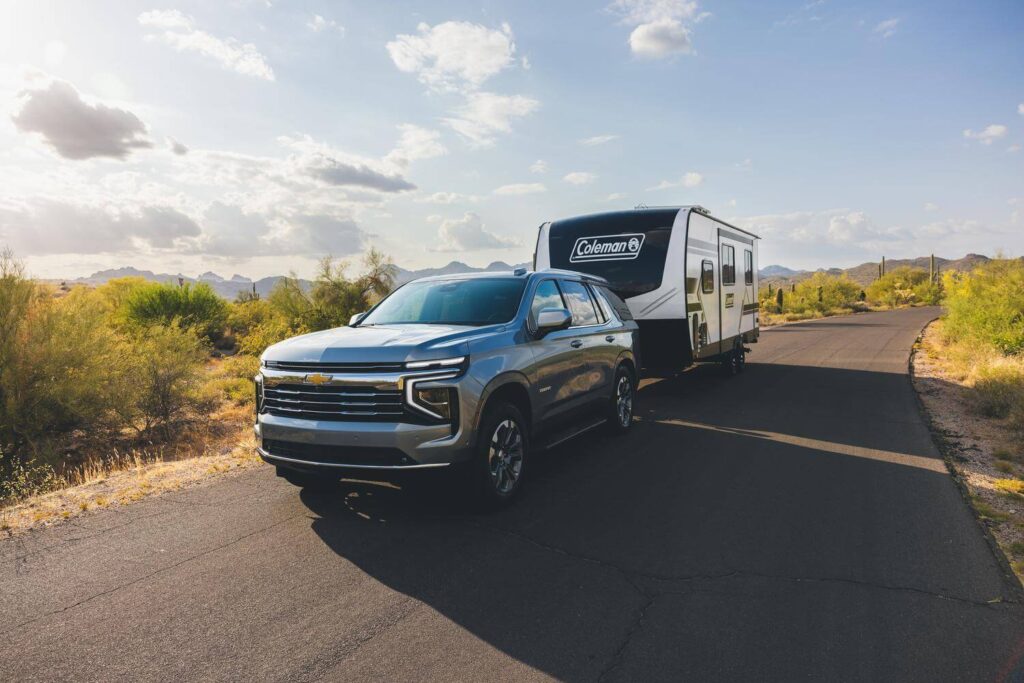
Starting with the fundamentals, trailer weight and towing capacity matter more than almost anything else. Before you fall in love with a floor plan, make sure your tow vehicle can handle it—not just the dry weight on the sticker, but the loaded trailer weight once you factor in water, cargo, propane, batteries, kitchen essentials, and everything else.
That means knowing your vehicle’s actual towing capacity, your payload rating, and how much tongue weight it can safely support. A beautifully built RV that pushes your truck past its limits isn’t “ready for you” at all—it’s a headache waiting to happen.
Learn more about RV weights for a travel trailer.
Where (and When) You’ll Camp
If your RV travels stretch into shoulder seasons with cooler temperatures, things like an enclosed (and ideally forced air heated) underbelly, tank heating pads, and dual-pane windows matter more.
If you love dry camping or staying at parks without full hookups, solar charging systems, generator wattage or compatibility, and tank sizes also factor into construction readiness. Bigger tanks, better solar recharging, and an onboard generator (or compatibility with a portable model) will allow you to enjoy longer stays and fewer interruptions.
Storage & Suspension
Images by Camping World
Don’t overlook the placement and amount of storage in the layout—you’ll have to live with it daily. Evaluate the height of overhead cabinets, depth of drawers, size of pass through storage compartments, access to storage under bed platforms, and anywhere else you’ll keep RV gear.
Does the build actually support the way you’ll pack, store, and move through the space?
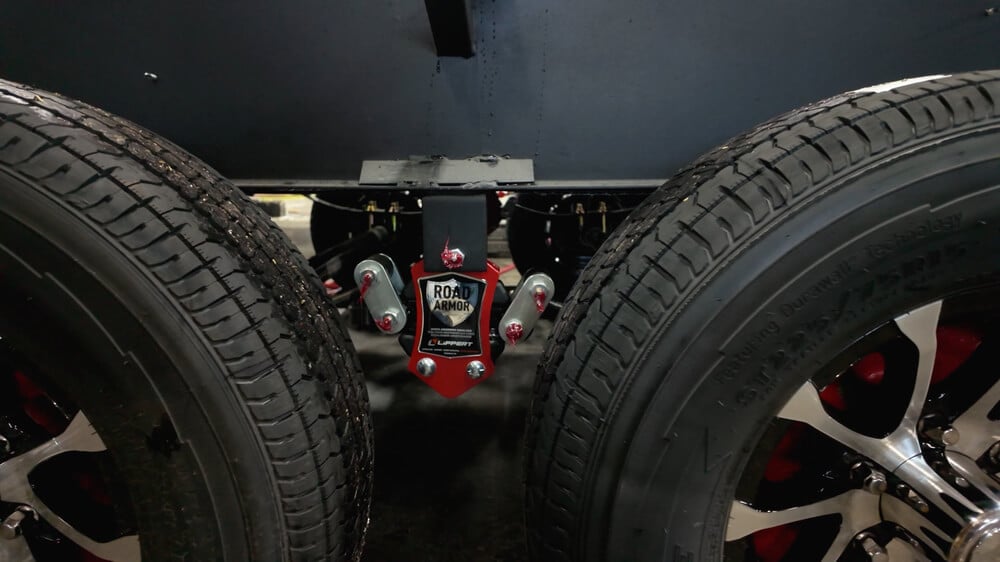
Finally, think about the ride. The various types of trailer suspension systems will impact how it handles the varying terrains you’ll encounter. Axle type and width between axles (for double axle models), tire size and make, and the presence of upgrades like shocks and equalizers will influence how an RV handles on smooth roads and rougher terrain.
Different construction methods—and different suspension setups—shine in different worlds. Knowing what you’ll use your RV for helps you decide whether its build was meant for that kind of use.
There you have it: Is it ready? Is it ready to work? Is it ready to work on? Is it ready for you? If you can answer Yes to all four questions, chances are you’ve found a camper that’s right for you. Just in case, here are a few more helpful RV buying guides:
What questions do you have about evaluating RV construction? Let us know in the comments below!


What about frame construction ? Are the cross members as tall as the frame web , frame heavy / thick enough in general ? Will cross members crack frame in suspension area if they are not full height and frame is as thin as most are. I can tell you they will (from experience) if you plan on putting more than a few thousand miles on it. Will tounge deflect , bend or break, I’ve seen 5 in the past 6 years. The people told me dealerships have told them everything from loaded too heavy to weigh distribution hitch (that dealer sold & installed)caused it. sorry warranty will not cover it call your insurance company. 5th wheel frames bending/ breaking at neck with fiberglass laminate box construction. I hate too sound like dealer but you need to call your insurance co.
Thanks for sharing this advise from your experience!