Over time, the sealant around your vents, seams, and roof edges breaks down due to UV exposure, temperature fluctuations, and road vibration. Resealing an RV roof on schedule will help prevent small gaps from turning into leaks that create expensive-to-repair structural damage. This guide walks through the RV roof resealing process: what you’ll need, how to remove failed sealant, how to prep the surface, how to apply new sealant or a roof coating, and how to let it cure.
If you’re not sure whether your RV roof needs a full reseal or spot sealant repair, start by learning how to inspect it.
Disclaimer: Getting on an RV roof or using a ladder is done at your own risk. Roofs can be slick, uneven, or structurally weak, and a fall can cause serious injury. Use proper fall protection, a stable ladder on level ground, and never work alone or in wet or windy conditions. If you are uncomfortable with heights, have mobility limits, or suspect soft decking, stay off the roof and hire a qualified technician.
What You’ll Need to Reseal Your RV Roof
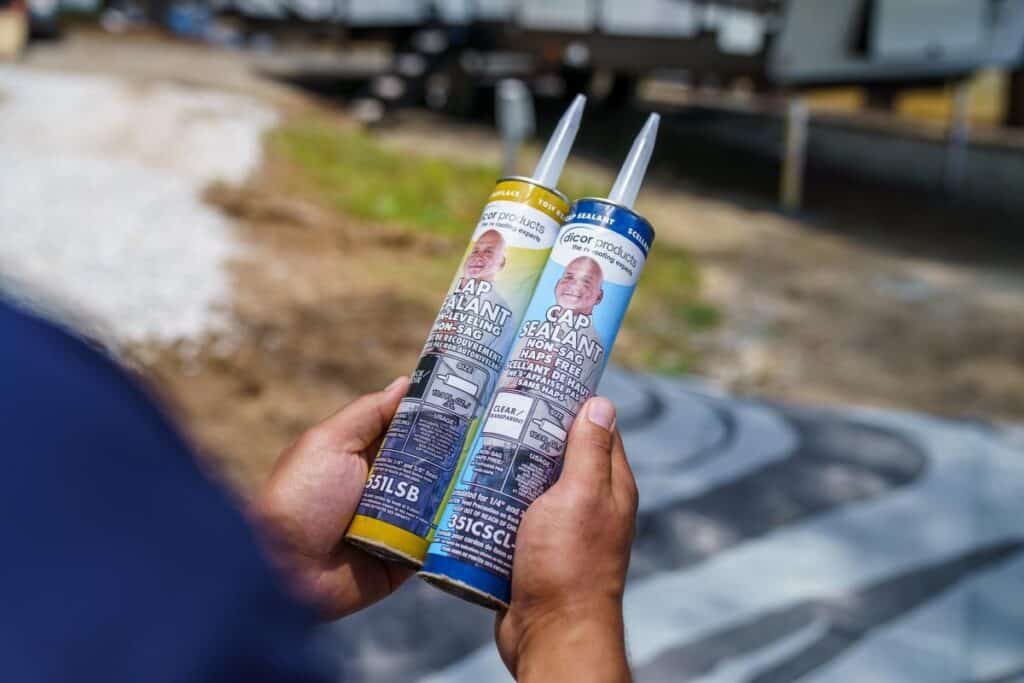
Every product choice depends on your roof material — EPDM, TPO, fiberglass, or aluminum — and sometimes on the company that made the membrane. Confirm your roof type in your owner’s manual or with your RV manufacturer before you buy anything.
- A dry forecast that covers your product’s full cure window
- A roller, tray, and brush for coating
- Soft-soled shoes and a sturdy ladder
- A roof cleaner approved for your membrane, a bucket, and a soft-bristle brush
- Painter’s tape and plastic sheeting, if your coating system calls for protecting the sidewalls and end caps
- A non-marring plastic scraper (never a metal blade) and clean rags
- The best RV roof sealant for your roof type and application.
- A caulking gun
- Personal Protection Equipment (PPE): chemical-resistant nitrile gloves, safety glasses or splash goggles, and a face mask or respirator when applying RV roof coatings.
Technician Tip: If you’re coating the entire roof, you’ll also need a complete roof coating system, which should include the coating, cleaner, activator, or primer recommended by the product manufacturer for your specific roof membrane.
Step 1: Remove Loose and Failed Sealant
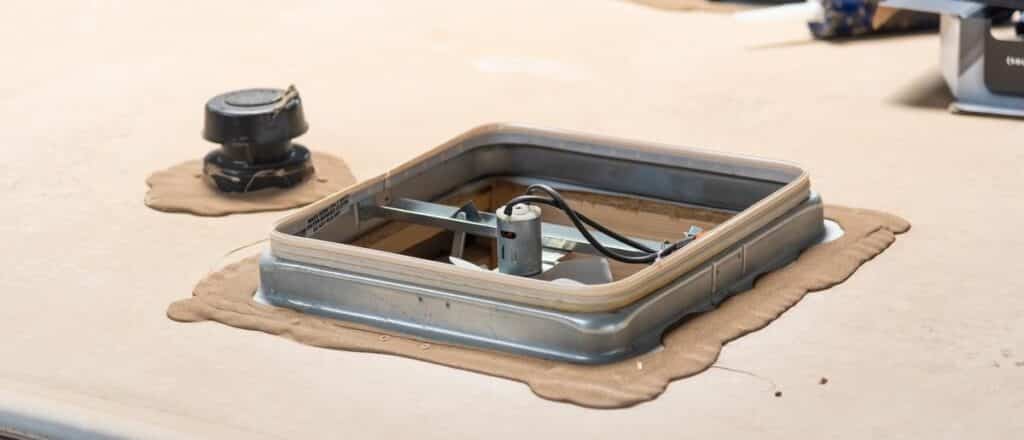
The process begins with removing old, ineffective sealant so that the new material can bond to a sound surface. Removing old RV roof sealant is where most DIY membrane damage happens, so work gently. Lift loose sealant by hand or with a plastic non-marring scraper held nearly flat, and never use a metal blade or anything sharp enough to cut the membrane. Brush away debris as you go, and make sure every screw head around each fixture is exposed so the new sealant can cover it.
Remove sealant that is:
- Pulling away from the roof or from a fixture flange
- Cracked through to the surface underneath
- Dried out, crumbling, or flaking
- Silicone — most RV lap sealants won’t bond to silicone or its residue, so it has to come off completely
Technician Tip: Some membrane manufacturers, such as Alpha Systems, advise against using putty knives on its roofs at all. Check with them before risking roof damage due to the use of an unapproved sealant removal tool.
If you find large sealant gaps or areas that suggest water is already getting in, find and fix the leak first with our RV roof leak repair guide.
Step 2: Clean and Prep the Surface
New sealant and coatings bond only to a clean, dry surface. Sweep the roof, then wipe down every area you’ll be sealing with a cleaner approved by your membrane manufacturer.
Don’t assume every cleaner is safe for your roof. For example, Alpha Systems recommends plain soap and water and warns that solvents can damage existing sealant and weaken plastic roof parts. Dicor advises wiping the area with rubbing alcohol before applying its lap sealant. Follow the instructions for your specific roof.
Rinse thoroughly and let the roof dry completely to avoid trapping any moisture under new sealant, which is a common reason a reseal fails. For clean, straight lines along long seams, run painter’s tape on both sides of the seam before you start sealing.
Applying an RV roof coating requires a few additional steps. Dicor’s rubber roof coatings require Dicor cleaner/activator on EPDM, which is applied, left to work, and rinsed off before coating. Its silicone coating requires a separate primer on TPO, and its fiberglass coating calls for Dicor Fiberglass Clean & Prep.
Dicor’s coating instructions also call for plastic sheeting over the sidewalls and end caps because its cleaners and coatings are formulated for the roof, not those vertical surfaces. Make sure you run sheeting all the way to the ground.
Step 3: Apply New Sealant or Coating

If you’re only resealing seams and penetrations, this step is all lap sealant work. If you’re coating the full roof, sealant still comes first: Dicor recommends finishing lap sealant work one to two weeks before coating so the sealant can cure before it’s coated over.
How To Reseal RV Roof Seams and Penetrations
The technique is the same regardless of roof type — only the product changes. Cut the tube nozzle for a bead roughly ¼” to ⅜” wide, then work one fixture or seam at a time:
- Use the right sealant for the surface. Self-leveling sealant goes on horizontal surfaces — around vents, skylights, pipe boots, solar mounts, and screw heads. Use non-sag sealant on vertical surfaces, roof-edge transitions, and raised areas, such as crank-style antennas, where you need to build up a bead to provide complete coverage.
- Apply a continuous bead. Cover every fastener head and extend the bead past the edge of each flange onto the membrane. Where new sealant meets existing sealant you’ve left in place, overlap the two so there’s no gap at the joint.
- Let the sealant level itself. Self-leveling sealant flows into gaps on its own. Alpha Systems notes there’s no need to spread it as you apply. It skins over within minutes, and working it after that point leaves a rough finish.
- Check every penetration before you move on. A single missed screw head is enough to let water in.
For more details on sealant application, our RV roof vent installation guide covers sealing around the vent flange.
How To Apply RV Roof Coating
A coating renews a roof that’s aging but still sound. It isn’t a repair for a damaged membrane. Dicor’s instructions state that deteriorated or damaged surfaces must be repaired or replaced before coating, and its coating kits aren’t intended for brittle roofing.
If you have a TPO roof, check with your membrane manufacturer before coating at all. Alpha Systems says its TPO roofs don’t need a coating and that coatings made for rubber roofs won’t adhere well to TPO, while Dicor offers a TPO primer for use with its silicone coating.
Once the roof is prepped and fully dry:
- Cut in first. Use a brush to coat around roof edges, fixtures, and seams.
- Roll the open areas. Using a paint roller, follow the roof coating’s instructions specifically. Dicor recommends a medium-nap roller; Alpha Systems recommends a short-nap roller. Work from the front of the roof back toward your ladder so you never have to walk on wet coating.
- Apply at least two coats. Dicor’s rubber roof coatings call for 1 gallon per 125 square feet per coat, which is about 4 gallons for an 8′ x 30′ roof (for two coats). Let each coat dry to the touch before applying the next.
- Check for complete coverage. The finished surface should be uniform, with no voids, pinholes, or blisters.
Coverage, dry times, and scheduling rules vary by product, and some systems, including Dicor’s acrylic coatings, must be completed from cleaning through the final coat in a single day. Read your coating’s instructions in full before you open the can.
Step 4: Let It Cure
Sealant and coatings keep curing long after they look dry, and how you treat the roof during that window affects how long the job lasts. Until your product reaches the cure milestones on its label:
- Stay off the roof. Walking on fresh sealant or coating can smear it or break the seal.
- Hold off on washing the roof. Check the label for specific warnings before you wash.
- Plan travel around the weather. Exposure to rain before the product is ready can damage the fresh bead.
On some rubber roofs, the membrane near fresh lap sealant can wrinkle or bubble as solvents in the sealant off-gas. This typically settles as the sealant cures, often within a week or two. Don’t puncture the bubbles, and have the area checked if they haven’t settled after about two weeks. Once the sealant has firmed up, look over your work for gaps, pinholes, or thin spots, and touch them up.
How Long Does It Take to Reseal an RV Roof?
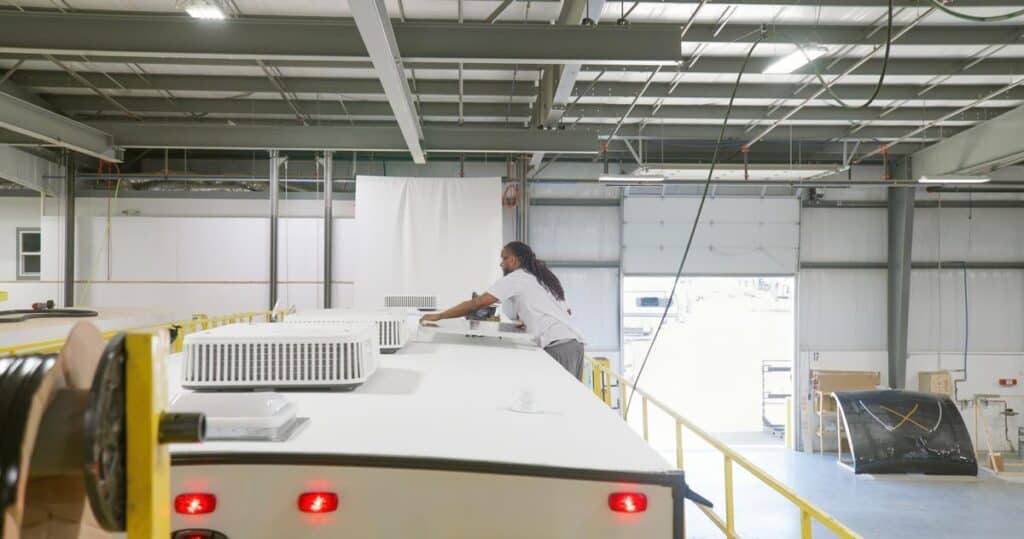
The application is the fast part. Removing failed sealant and cleaning the roof usually takes longer, and the total time depends on your roof’s size and how many fixtures it has. For a seams-and-penetrations reseal, give yourself a full day. A full coating is a separate project: plan a dedicated day for cleaning and coats, scheduled one to two weeks after the sealant work.
When to leave it to a professional: Resealing is a manageable DIY job for owners who can safely get on the roof, but a technician is the better choice if:
- You can’t safely access or walk on your roof
- You find soft spots, tears, or other membrane damage during prep
- Your RV or membrane warranty requires certified service or documented maintenance
- You’re coating a large roof and can’t finish the process within the product’s required time frame
Learn about pricing on professional resealing in our RV roof repair cost guide.
Frequently Asked Questions
RV roof sealant is dry to the touch within minutes, but takes much longer to fully cure. Dicor’s self-leveling lap sealant lists approximate drying times in 50°F to 70°F weather: skinned over in 5 minutes, waterproof in 4 hours, 80% cured in 48 hours, and fully cured in 30 days. Cooler temperatures and high humidity slow every stage. Coatings follow their own timelines. Dicor’s acrylic coating, for example, needs 12 to 24 hours to dry depending on conditions.
The technique for resealing an RV roof isn’t difficult. If you can run a bead of caulk, you can apply lap sealant. The hard parts are working safely on the roof and having the patience to remove failed sealant without damaging the membrane. A full coating is more demanding than a sealant-only reseal because it involves masking, even coverage, and strict timing between steps.
Technician Tip: When applying lap sealant, use a circular motion to eliminate any air pockets and keep bubbles from forming in your new sealant job.
Choose a dry, mild day with no rain in the forecast for at least your product’s rain-ready window. Some manufacturers, such as Dicor, recommend warming sealant tubes to room temperature before applying in cooler weather. Extreme heat is a problem, too. Some technicians advise against applying sealant if temperatures will reach 95°F while it cures. Coatings have stricter limits: Dicor’s silicone coating should only be applied when surface and air temperatures are between 35°F and 100°F, and the air temperature isn’t within 5°F of the dew point, which requires starting after the morning dew has dried. Dicor’s acrylic coating can also freeze and fail if temperatures drop below 32°F within 48 hours of application.
In some cases, you can apply new sealant over old sealant that’s still firmly bonded. But it also depends on the sealant manufacturer’s recommendation. Alpha Systems instructs owners to leave adhered sealant in place, clean it, and apply its sealant generously over the top, and Dicor advises that its self-leveling sealant can fill cracks and voids in an existing, well-adhered seal. Some technicians still prefer removing old layers to prevent buildup after years of touch-ups. Either way, anything loose, cracked through, or made of silicone has to come off, and the old sealant must be clean and dry before the new sealant goes on.
Compatibility with your roof membrane matters more than matching the brand. Start by identifying your membrane type and manufacturer. Your RV manufacturer can usually confirm it with your VIN. Some membrane manufacturers require their own sealants. Alpha Systems, for example, states that only Alpha-brand sealants may be used on its roof membranes. Some standard lap sealants can also cause cosmetic wrinkling on certain TPO membranes. Because using a product your membrane manufacturer doesn’t approve could affect warranty coverage, check its guidance before you switch.
Once the lap sealant reaches the waterproof stage listed on its label, rain shouldn’t affect the seal. Rain before that point can pit, thin, or wash away part of the bead. Once the roof dries, inspect the new sealant and touch up damaged spots over a clean, dry surface. Coatings are more vulnerable: rain on uncured coating can cause washout, streaking, and runoff down the sidewalls. Let the roof dry, check for thin or missed areas, follow the label’s recoat instructions, and promptly rinse any coating runoff from the sidewalls.
For product recommendations matched to your roof type, see our best RV roof sealant guide.
Have questions about roof resealing? Good Sam Elite members can call the Technical Support hotline at 844-649-4700 for questions and maintenance tips.
Have you resealed your RV roof yourself? Share your best tips and lessons learned in the comments below.