SUMMER IS CALLING, and your RV is almost ready to answer. Whether you’ve been waiting for warmer weather or you knocked out a quick shakedown trip in the spring, getting your camper ready for summer before the longer, hotter adventures begin is essential.
De-winterizing your RV is a great first step, but getting your camper truly ready for summer demands a second look. Peak camping season puts your systems under real stress: air conditioners run around the clock, fresh water turns over fast, tires bake on hot asphalt, and the sun works on every seal and seam on your roof. A thorough pre-summer RV prep checklist means fewer surprises at the campground and more time actually enjoying the camping season.
Key Takeaways
- Getting your camper ready for summer is a different process than spring dewinterization — it focuses on the systems that take the most abuse in heat and heavy use.
- Your RV’s roof, air conditioner, and tires are the three most common sources of mid-season breakdowns, and all are preventable with a pre-summer inspection.
- Some critical checks — including LP gas pressure testing and electrical system inspections — require a certified technician and should be scheduled before your summer trips.
Why Summer RV Prep Is Different from De-Winterizing
De-winterizing your RV is about waking it up safely after cold-season storage: flushing the antifreeze, recharging the batteries, and confirming that your systems still function.
On the other hand, getting your camper ready for summer means preparing it for higher temperatures, longer drives, higher daily water use, and more consecutive nights on the road.
The RV prep list below is built around the systems most likely to fail when the heat is on — and the inspections that tend to get skipped when RVers are eager to get moving.
Download this RV prep checklist for easy reference at home or on the road
Step 1: Inspect Your Roof, Seals, and Slide-Out Gaskets
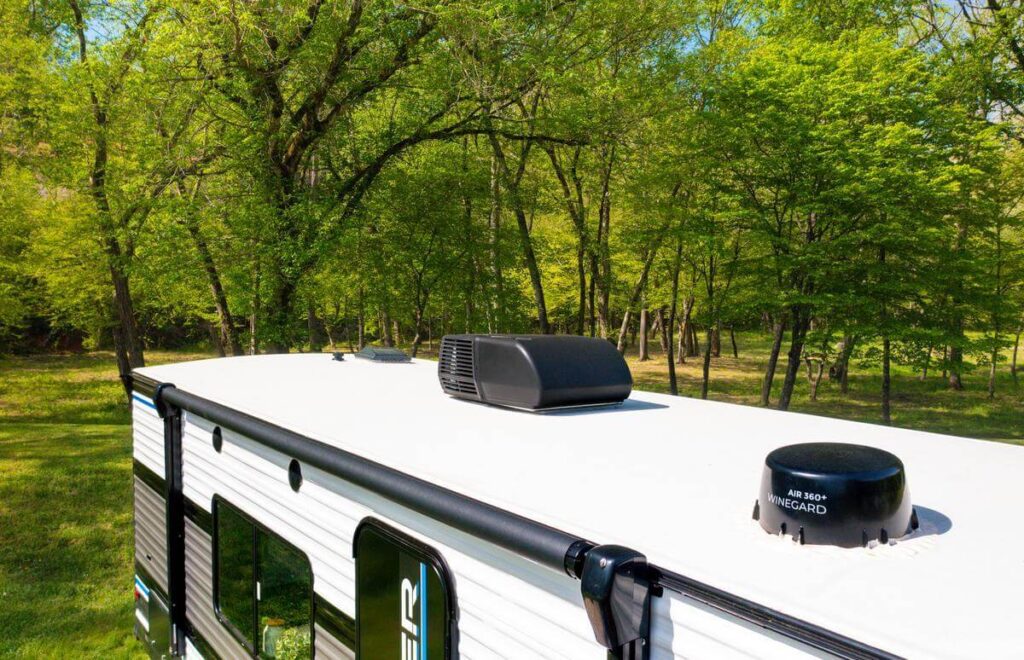
The single most important summer prep step you can take is a thorough roof inspection, and it should happen before your first major trip of the season.
Whether your RV roof is fully walkable or not, you need to visually inspect it from front to back. Use a ladder if it isn’t!
What you’re looking for: cracks or gaps in the sealant around roof vents, the air conditioning unit, any antennas, and the seams where the roof meets the sidewalls. Even a small crack in the caulking can let water in. Water damage is slow, silent, and expensive — a quick inspection and a tube of RV roof sealant costs almost nothing compared to the alternative.
Technician Tip: Do your roof inspection right after the first significant summer rain. A wet interior ceiling, a soft spot underfoot, or water pooling near a vent tells you more than any dry visual scan ever could.
While you’re up there, inspect the A/C shroud for cracks or missing chunks, and check that the gasket between the A/C unit and the roof is still compressed to roughly 50%. A compromised shroud lets moisture and debris into the cooling system — problems that compound quickly during peak use.
Also, check your slide-out gaskets and door seals. The rubber seals around the slide rooms are among the most common places where water sneaks in. Run your hand along each seal, looking for dry, cracked, or torn sections.
And once you’re safely back on the ground, inspect all exterior compartment latches and door seals — summer heat accelerates rubber degradation, and seals that looked fine in March may not look fine in June.
Step 2: Test Your Air Conditioning System (Before You Need It)
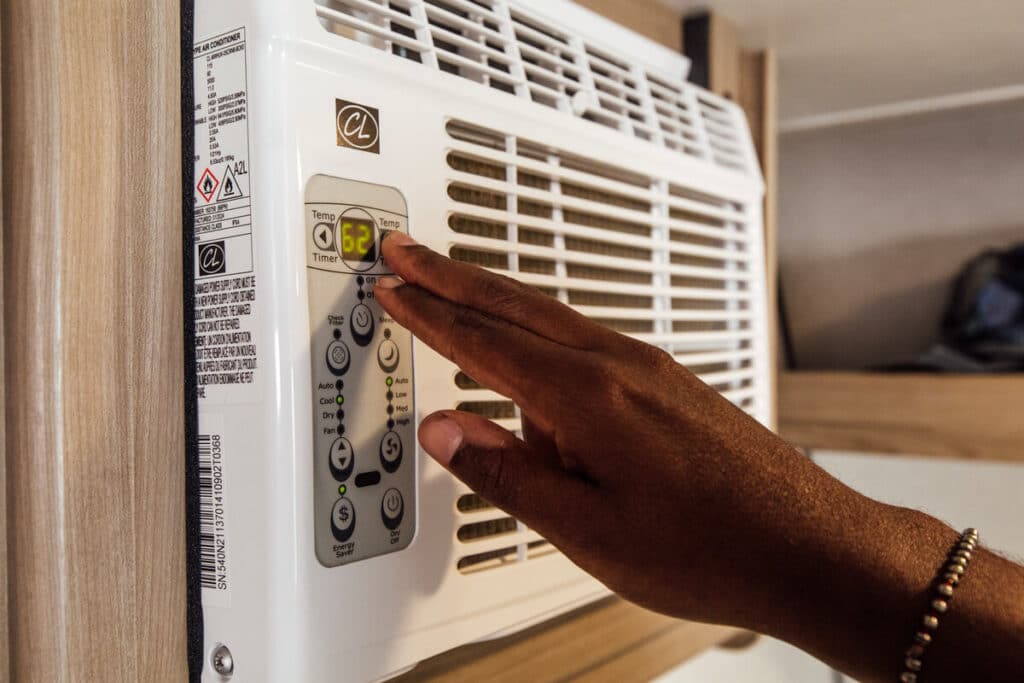
An air conditioner that fails on the first 95-degree night of the trip is one of the most common — and most avoidable — RV summer disasters. The time to find out your A/C has a problem is at home, not at the campground.
Start with the filter. Clean your A/C’s air filter before your first summer trip, and plan to clean it again every 4 to 6 weeks during peak-use season. Locate the filter (check your owner’s manual if needed), rinse it with warm water, and let it dry completely before reinstalling. A clogged filter restricts airflow, forces the unit to work harder, and, in severe cases, causes the coils to ice over and drip water into your RV.
Next, run your A/C on a warm day — not just for a few minutes, but for a sustained 30-minute test. You’re listening for unusual sounds (grinding, rattling, or a compressor that cycles on and off too quickly), watching for water dripping from the ceiling assembly, and confirming the unit is actually cooling the interior, not just circulating warm air.
If you notice your camper A/C leaking water inside, or the unit seems to be struggling to hold temperature, schedule a diagnostic before your trips begin. RV air conditioning service books up fast in summer — the earlier you call, the better.
Technician Tip: Summer heat means your A/C will run harder and longer than at any other time of year. Help it out by parking in shaded sites where possible, using window coverings to block direct sun, and avoiding cooking steam-heavy meals inside. A well-maintained unit can still run efficiently on the hottest days if it’s not fighting a sauna.
Read other tips to keep your RV cool in the summer heat.
Step 3: Perform a Thorough Tire Inspection
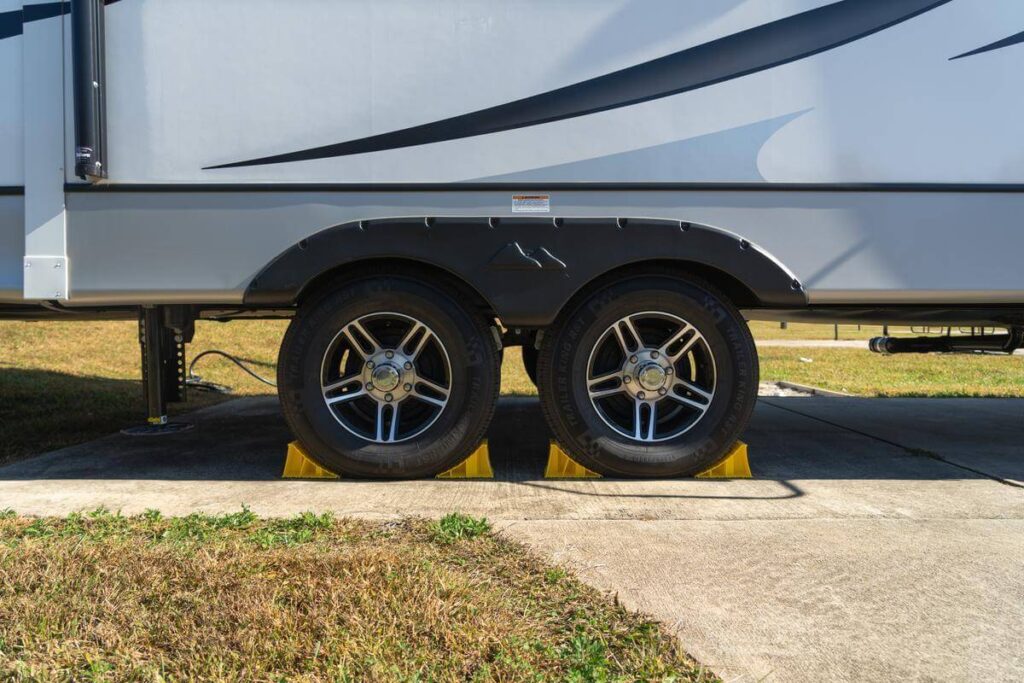
Tires are the foundation of every RV trip, and summer is the season when tire failures are most likely to happen. Hot pavement raises tire temperatures significantly, and if your tire pressure is already low, you’ve seen visual signs of UV cracking, or they’re just past their service life, the combination of heat and highway speed is exactly the scenario that causes blowouts.
Before any summer trip, check tire pressure in the morning before the sun warms up the tires — that’s the most accurate reading you’ll get. Refer to your owner’s manual or the tire placard on your RV for the correct cold-inflation pressure, not the number printed on the tire sidewall. Tires naturally lose pressure over time, so they’re often low after storage.
While you’re checking pressure, inspect each tire’s sidewall for UV cracking — those fine cracks that appear from sun exposure and age. If you see significant sidewall cracking, the tires need to be replaced regardless of the tread depth. Most RV tire manufacturers recommend replacement every 5 to 7 years, and many suggest that even earlier if you camp frequently. Don’t let a “good-looking” tread depth convince you an old tire is road-ready.
Also check that your lug nuts are properly torqued and that all RV tires — including the spare — are accounted for and serviceable. If you have a tire pressure monitoring system (TPMS), confirm it’s reading correctly on all positions before you leave.
Technician Tip: Re-check your tire pressure after the first hour of driving on your initial summer trip. Pressure will rise as tires heat up, and an already borderline tire can quickly become a problem.
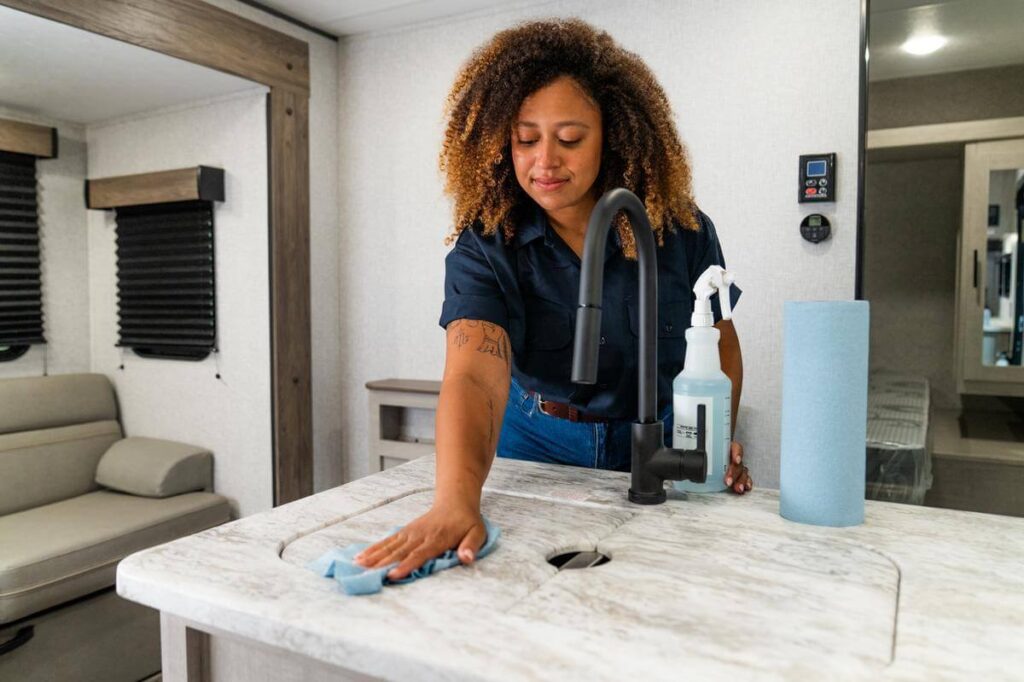
Step 4: Flush and Sanitize Your Fresh Water System
If you dewinterized your RV weeks or months ago and it’s been sitting, your fresh water tank needs to be sanitized before you fill it up for a summer trip. Bacteria and algae can grow in a fresh water tank even at room temperature, and summer heat only accelerates that process. This is not a step to skip, especially if you’ll be drinking from the on-board water supply.
The process is straightforward: mix a small amount of household bleach (roughly ¼ cup per 16 gallons of tank capacity) with fresh water, add the bleach mixture to the tank, fill the tank the remainder of the way with fresh water, turn on the water pump, run water through every faucet until you smell bleach, and let the solution sit for several hours. Then drain the system completely and flush with multiple tanks of fresh water until there’s no trace of bleach smell.
While you’re sanitizing an RV fresh water tank, check under every sink and around the water heater connections for drips or soft spots that might indicate a slow leak that developed over the offseason. And if your RV has a water filter, now is a great time to replace the cartridge before summer use begins.
Step 5: Test All Appliances — Especially the Refrigerator
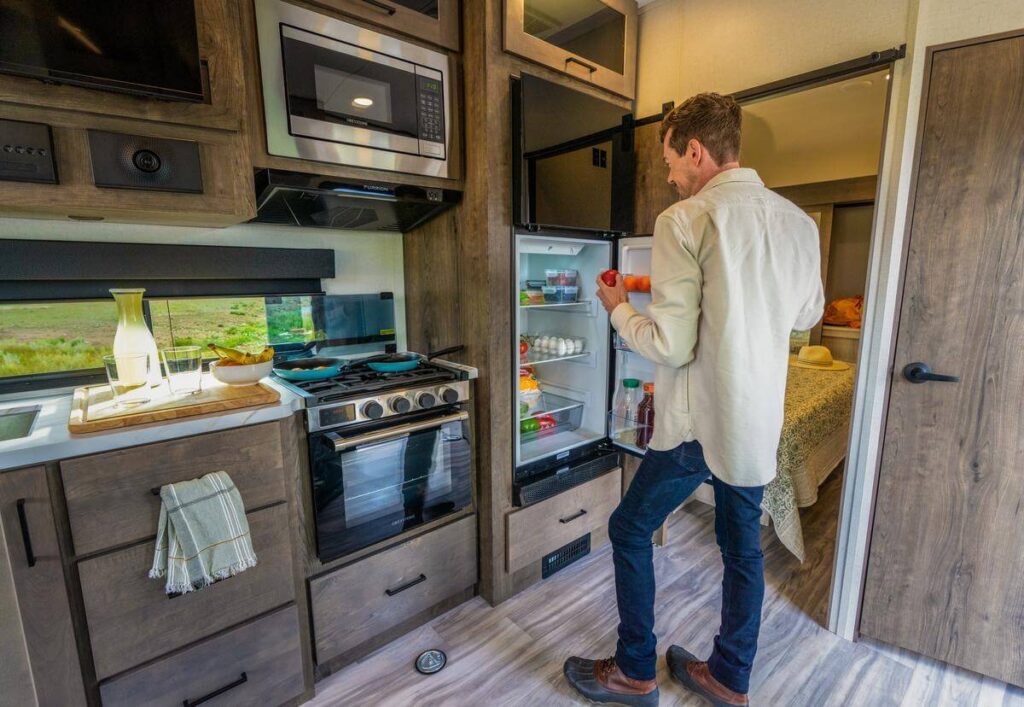
An RV refrigerator that doesn’t cool properly is a food safety issue and a frustrating mid-trip discovery. Run your refrigerator for at least 24 hours to make sure it cools adequately before summer trips. This is especially important if your fridge has been sitting unused, depending on the type of refrigerator.
For example, absorption refrigerators take longer to reach operating temperature than residential or 12V units, and that lag is even more pronounced in hot summer weather.
While the fridge is running, test your other appliances systematically:
- Stovetop and oven: Light all burners and confirm a steady, consistent flame on each. If you have a propane oven, confirm its ignition and holding temperature.
- Microwave: Run it for 30 seconds with a cup of water.
- Water heater: Confirm it’s heating properly, and check the area around the access panel for any propane smell or soot (soot around the burner indicates incomplete combustion and should be inspected by a technician).
- Generator (if equipped): Run it under load — with an appliance or two operating — for 30 to 60 minutes to keep the internal components lubricated and confirm it’s putting out clean, stable power.
Learn more about basic RV maintenance tips that keep every system running smoothly.
Step 6: Inspect Your Safety Systems
Safety systems are easy to overlook. But summer camping — with more propane use, more people in enclosed spaces to enjoy the air conditioning, and a tendency to keep the coach closed up more frequently — is when working safety systems matter most.
Work through this checklist before your first summer trip:
- Smoke detector: Test with the built-in test button. Replace the battery, even if it tests correctly — most RV smoke detectors use 9-volt batteries that should be swapped regularly.
- Carbon monoxide (CO) detector: Test and replace the battery. CO detectors also have a finite lifespan (typically 4-7 years) — check the date of manufacture and replace it if it’s past its service life.
- LP gas (propane) detector: Test it and confirm it’s within its service life. If it’s beeping intermittently or not responding to the test, replace it.
- Fire extinguisher: Check that the pressure needle is in the green zone and that the pin and seal are intact. Replace or recharge any extinguisher that’s been discharged, even partially.
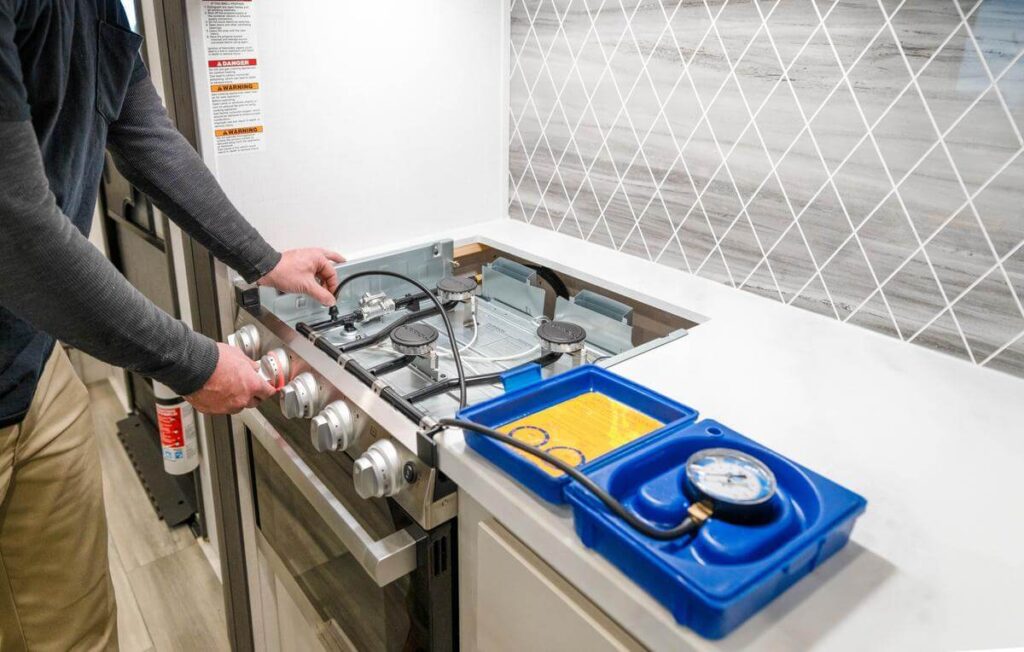
Beyond these checks, your LP gas and electrical systems should be professionally tested before each season. Leaks in a propane system are dangerous, and these tests require specialized tools that aren’t practical for DIY. Camping World Service Centers offer these inspections — and scheduling early in the season means you’re not competing with the summer rush for a service appointment.
Step 7: Deep Clean the Interior and Restock Your Essentials
A winter in storage — or even a few weeks of sitting after a spring trip — can leave your RV’s interior in need of some attention.
Start with a thorough inspection for pests and moisture. Check in the backs of cabinets, under the mattress, and in any storage compartments for signs of mice, insects, or mildew. A small amount of moisture that went unnoticed in the spring can become a bigger problem by summer.
While you’re in the cabinets, clear out any pantry items that expired over the offseason and restock essential dry goods and consumables before your first trip.
Then clean top to bottom: wipe down all surfaces, clean the bathroom thoroughly, launder bedding, and mop the floors. With the A/C running for long stretches in summer, your interior air quality will be much better if you start from a clean base.
Finally, restock your first aid kit and check the expiration dates of any medications you keep on board. Add sunscreen to your supply list if it isn’t already there — it disappears faster than you’d expect. And if you have an RV with an outdoor kitchen or grill setup, make sure all LP connections and components are in good working order before you discover otherwise at the campground.
Step 8: Book Your Professional Inspections Early
Some of the most important summer RV prep requires getting on a service schedule before peak season arrives and appointment availability shrinks.
For summer prep specifically, a few professional inspections are worth prioritizing:
- LP gas pressure test: Verifies that your propane system is operating safely and without leaks.
- Electrical system check: Confirms your 12V DC and 120V AC systems are functioning correctly — particularly important if your RV sat for an extended period.
- Slide-out servicing: Slide mechanisms should be lubricated and inspected by a certified technician at least once a year.
- Annual A/C inspection: If your air conditioner(s) haven’t had a professional inspection this season, a technician can catch issues before they become campground emergencies.
Scheduling pre-summer maintenance in the spring — rather than waiting until a problem emerges — is safer and significantly less stressful.
Frequently Asked Questions
Dewinterizing focuses on undoing winter storage preparations: flushing antifreeze, recharging batteries, and confirming that systems work after months of dormancy. Getting your camper ready for summer goes further — it focuses on the systems that take the most abuse in heat and heavy use, including your roof and seals, air conditioner, tires, and fresh water system. Think of unwinterizing a camper as the starting line and summer prep as the tune-up lap.
A spring shakedown trip lets you test your major systems in low-stakes conditions. Summer prep closes the gap between “it works” and “it’s ready for extended heat.” After your shakedown, revisit the roof and seals (especially after your first heavy rain), clean the A/C filter, sanitize the fresh water tank, and check all safety systems.
A solid summer RV prep checklist covers: roof and seal inspection, A/C filter cleaning and functional test, tire pressure and sidewall inspection, fresh water tank sanitization, appliance testing (refrigerator, stovetop, water heater, generator), safety checks (smoke, CO, LP gas detectors, fire extinguisher), interior deep clean and restock, and scheduling professional inspections for LP gas, electrical systems, and slide-out servicing.
Clean the filter, run the unit for at least 30 minutes on a warm day, and check for unusual sounds, poor cooling, or water dripping from the ceiling assembly inside your RV. Also, inspect the A/C shroud and roof gasket during your roof check. If anything seems off — or if you haven’t had a professional A/C inspection this year — schedule one before peak summer heat arrives.
More Resources:
- How to Dewinterize Your RV to Prep for Spring Camping
- What Is an RV Shakedown Trip? (And How to Plan One)
- RV Maintenance Checklist: Seasonal, Annual, and Pre-Trip Tasks
- RV Air Conditioner Maintenance Tips
What does your summer RV prep routine look like? Tell us in the comments below.


