
Given the risks of sub-freezing temperatures, winterizing your RV is a critical step to avoid costly repairs. In simple terms, winterizing means preparing your RV’s plumbing and systems to withstand freezing temperatures by draining the water and replacing it with RV antifreeze.
This guide applies to winterizing the water system on all RV types, but every RV is slightly different. Some include extra systems like ice makers or dishwashers that require special care, but these RV winterization steps will cover the basics. If the process still feels intimidating, Camping World technicians can winterize an RV for you. But if you’re ready to tackle it yourself, use the guide below as your checklist.
If you’re winterizing a motorhome, you likely have additional systems to protect before storage. Your generator should be winterized per its own procedure, and your chassis and engine coolant system should be checked against your manufacturer’s guidelines. Some motorhomes have additional water-using appliances or hydronic heating systems. Always consult your owner’s manual for model-specific requirements.
Tools Needed For Winterizing Your RV
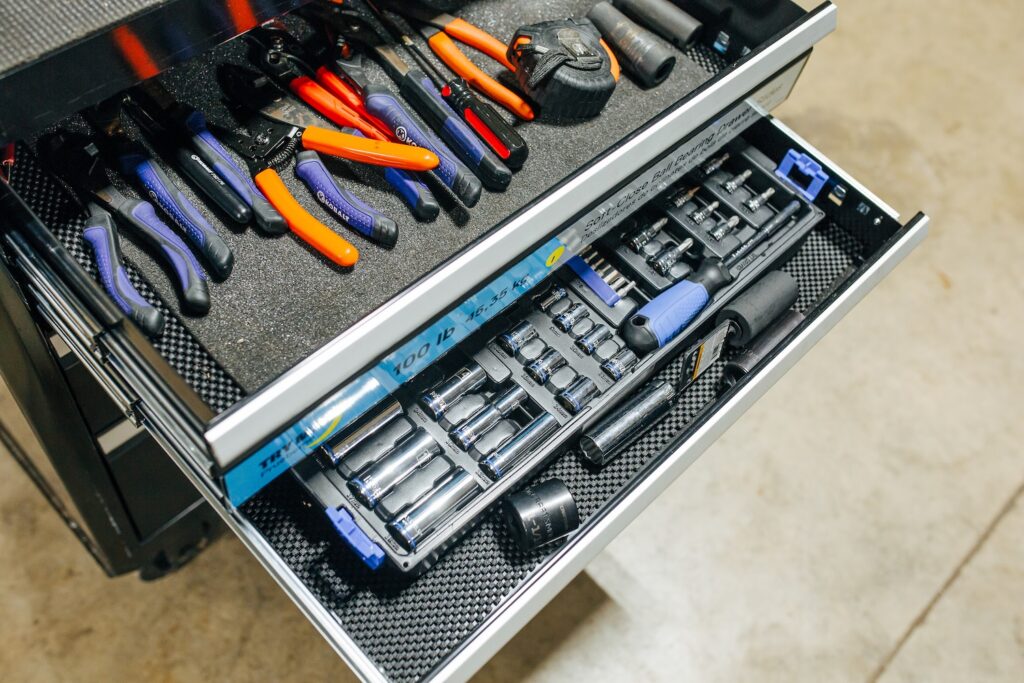
For proper winterization, you’ll need the following tools and supplies:
- Cordless power drill with Philips and/or #2 square bit
- Socket wrench and socket sized for your drain plug (typically 1-1/16″, ⅞”, or 15/16”)
- Flashlight
- New anode rod or plastic drain plug (as required)
- Thread tape rated for potable water
- 3-4 gallons of RV antifreeze (extra never hurts)
- 2 crescent wrenches or a set of open-end wrenches
- Siphoning kit (if the pump is not already equipped)
- Water heater bypass kit (if not already equipped)
- Needle-nose pliers or a screwdriver
You can also use this guide to build an RV winterizing kit you can use season after season.
From your RV essentials, you’ll also need a potable water hose, a secondary garden hose (for use with your black tank flush, if so equipped), and a sewer hose and connections.
How To Winterize an RV
Follow these RV winterization steps to protect your plumbing system from freezing temperatures.
Not sure if you’re timing it right — or planning ahead for next fall? See our regional guide on when to winterize your RV.
1. Partially Fill Your Fresh Water Tank
Begin by adding 5-10 gallons to your fresh water tank. This will provide a sufficient water supply to help you flush debris from your holding tanks and water heater.
2. Drain and Flush the Water Heater
Next, make sure the water heater is turned off and allow it to cool completely. Never attempt to drain it while it’s hot or under pressure. You should also disconnect power (electric by flipping the breaker and propane by closing the container valves, if applicable) to prevent the heating source from turning on while empty.
Once it’s cooled, use a socket wrench with the appropriately-sized socket to carefully remove the drain plug or anode rod, and open the pressure relief valve to let air flow through and water drain out smoothly.
After checking that no faucets or low-point drains are open, turn on your water pump to flush debris from the water heater. As temperatures drop, water left in the heater tank can freeze and expand, potentially cracking the tank or damaging fittings. Run the pump for 30-60 seconds, then turn it off and let the remaining water drain from the heater tank.
Once drained, replace the anode rod or drain plug loosely (or store it for later inspection and replacement).
Technician Tip: If your RV has a tankless water heater, it doesn’t have a large reservoir to drain. But you’ll still need to blow out the lines to ensure no water remains inside. Always follow your manufacturer’s instructions for winterizing a tankless system to prevent internal damage, as recommended procedures vary. For a general walkthrough, see our guide on winterizing an RV tankless water heater.
3. Bypass the Water Heater (if applicable)
Bypassing the water heater prevents water from entering the tank during the remaining steps. It also keeps you from using a lot of extra (and unnecessary) antifreeze when that time comes. Many RVs come with a bypass valve already installed, while others may require a manual setup.
Find the water heater’s interior access panel and use a cordless drill with the appropriate bit to remove the panel. You’ll then have access to adjust the bypass valve to the proper position to keep antifreeze from entering when you add it to the system.
4. Drain the Fresh Tank and Low Point Drains
Open the fresh water tank drain valve or plug and allow the tank to empty completely.
Go back inside, turn on the water pump, and open each faucet (hot and cold) until water no longer flows from each. Don’t forget the shower faucets, any external faucets, and the toilet flush pedal in this step!
Once the fresh tank is empty, open your low-point drains (usually one for hot water and one for cold) to remove any remaining water in the lines. Some owners open the low-point drains and cycle the water pump on for 10-15 seconds to help
When everything is drained, close all low-point drains and faucets and remove any inline water filtration elements.
Other Ways to Clear the Lines
The water pump method above works well for most owners, but two alternatives are worth knowing:
Gravity draining skips the pump entirely. Open all faucets, the toilet flush, and the low-point drains, and let gravity pull the remaining water out of the lines. It takes longer and leaves more residual water than the pump method, but it requires no additional equipment. Flushing with antifreeze afterward compensates for any moisture that remains.
Compressed air is the most thorough method for clearing water before adding antifreeze, but it requires an air compressor (set no higher than 30-40 PSI) and a blow-out adapter to connect to your RV’s city water inlet. Exceeding that pressure risks damaging your lines and fixtures. If you have the right equipment, blow out one faucet at a time (hot and cold separately) until no water or vapor is visible, then add antifreeze. Note that compressed air alone without antifreeze does not fully protect your lines and is not recommended as a standalone winterization method for most owners.
Learn more about how to blow out the water lines on an RV.
5. Drain and Flush the Black and Gray Water Tanks
Never let wastewater sit in your RV over the winter (or ever!). Stagnant waste can lead to unpleasant odors, bacterial growth, and, in freezing conditions, serious damage to your tanks and plumbing. Drain both tanks: blackwater first, then gray. This helps rinse out any residue from the sewer hose.
Once the tanks are empty, flush and clean the black tank using a black tank flush system, a specialized cleaning wand, or a black tank cleaner. This step removes leftover debris and helps prevent buildup or sensor issues while your RV is in storage.
After flushing, close the tank gate valves completely before draining and storing your sewer hose. A clean, dry waste system will make spring de-winterization much easier (and much less smelly!).
Learn more about RV holding tank maintenance.
6. Add RV-Safe Antifreeze
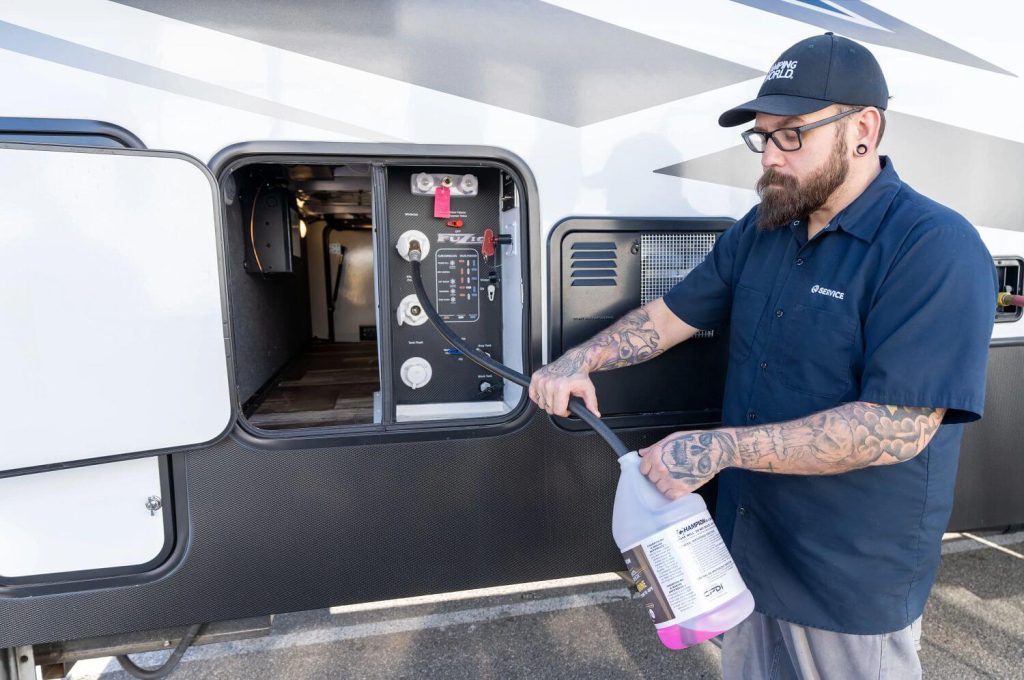
Some RVs will require a siphoning kit to add antifreeze. These kits typically come with specific installation instructions. Others come with a siphoning hose connected to the internal plumbing. For the latter, there’s typically a valve that needs to be opened to allow the water pump to draw antifreeze into the system.
Find the right type of RV antifreeze.
With that valve open, place the siphoning hose (installed or with the kit) into your first gallon jug of antifreeze.
Turn on the water pump to draw antifreeze into the water system, and repeat this with a second gallon jug.
Starting with the closest sink to your water pump, open one of the faucets (hot or cold) until you see a steady stream of pink antifreeze exiting the fixture. Repeat with the other faucet, then continue until you’ve run antifreeze through every interior hot- and cold-water line.
Again, don’t forget the shower and toilet. At this time, you may need to add additional antifreeze, but save at least one gallon.
Head outside and open each faucet on any exterior sinks and showers until they run pink. Repeat with each of the low-point drains.
Once complete, turn off the water pump.
Technician Tip: For tankless water heaters, follow the instructions specified by the manufacturer.
7. Pour Antifreeze Down P-Traps
To finish the plumbing winterization, pour an additional 1-2 cups of antifreeze down each sink and shower drain to protect the U-shaped plumbing section from freezing.
Add roughly a half-gallon of antifreeze to the black water tank by pouring it down the toilet. Leave 3-4 inches of antifreeze in the toilet bowl. This is to protect the seals for the drain valves and flush ball from drying out, cracking, or sticking. It’s also beneficial for the gray tank(s).
Finish by double-checking that the water heater’s heating element is turned off and all faucets are closed.
RV Winterization Checklist
Once you’ve completed these steps, use this quick-reference checklist to confirm everything is buttoned up before you close the door for the season.
- Water heater flushed and drained
- Water heater turned off, cooled, and disconnected from power
- Anode rod or drain plug replaced loosely
- Water heater bypassed and/or antifreeze added
- Holding tanks drained (black tank flushed)
- Sewer hose drained and stored
- Antifreeze added to all interior hot and cold water lines until running pink
- All exterior faucets and low-point drains run until pink
- Water pump turned off
- Antifreeze poured down all P-traps (1-2 cups per drain)
- ½-gallon of antifreeze added to the gray and black tanks (3-4 inches left in the toilet bowl)
- Water heating source confirmed off
- All faucets closed
Not sure if it’s worth the effort this season? Learn what happens if you skip winterization.
Who Needs Professional RV Winterization?
DIY winterization works well for plenty of RV owners, but there are situations where professional service is the smarter call.
Who should consider professional winterization:
- Owners unfamiliar with their RV’s plumbing layout. If you’re new to RVing or unsure where your bypass valves and low-point drains are located, a certified technician will get it done right.
- Owners of RVs with advanced features, such as ice makers, a water dispenser in the fridge door, dishwasher, washing machine, outside kitchens, water filtration/RO systems, or hydronic (boiler) systems.
- Anyone who wants a warranty-backed result. DIY winterization has no safety net. Select professional winterization services may.
Wondering how it compares to doing it yourself? See our breakdown of how much RV winterization costs.
Frequently Asked Questions
Many RV owners successfully winterize their campers each season. Using a siphoning kit to draw RV antifreeze through the plumbing system is the most common approach, as not all owners have access to a compressor with an adjustable PSI regulator. The main exception is owners unfamiliar with their RV’s plumbing layout, who risk leaving moisture in unexpected areas.
If you winterized using RV antifreeze, close all faucets after the antifreeze has run pink through each one. The antifreeze in the lines provides the freeze protection, so there’s no need to leave them open. If you used only gravity draining (or compressed air), it’s safer to leave faucets slightly open in case any residual water remains, as even a small amount of trapped water can expand and crack plumbing or fittings in extreme cold.
Most RVs require 2–4 gallons, though larger rigs may need more. See our complete guide on RV antifreeze for a full breakdown.
RV antifreeze pumped through a properly winterized system provides freeze protection throughout a typical winter storage season. Antifreeze sealed in RV plumbing lines technically remains stable for 2-5 years, but owners should de-winterize and re-winterize each season. Antifreeze that sits in P-traps exposed to air will evaporate more quickly and may need to be refreshed if storage extends beyond one season. When in doubt, re-winterize rather than assume last season’s antifreeze is still providing full protection. The longer it has been winterized, the more water and effort it requires to completely flush out the antifreeze residue.
Once the RV is winterized, do not use the sinks, shower, or toilet at all. Any wastewater or body waste that goes down the drain is highly likely to cause serious problems. That said, the RV can still be used in a “dry” fashion during the winter. Take potable water in the 5-gallon blue jugs. Filter it for drinking in a Brita-style pitcher. Use a dishpan in the sinks or shower to take a sitz bath, wash dishes, or brush your teeth, ensuring none of the water goes down the drain. Then dispose of the water outdoors in an appropriate manner. Portable toilet liners can be used to line the toilet bowl. When finished, add a capful of absorbent crystals to the bag to solidify the waste material. Then dispose of the bag appropriately.
For a smooth start to spring, check out our guide on how to dewinterize your RV when camping season rolls back around.
What tips have made your RV winterization process easier? Share them in the comments below!



At my hot water tank do I close the valve for the cold also so no antifreeze goes in to that hot water container
Hi Brenda,
Can you confirm if you’re winterizing an RV with a tankless or a standard tanked water heater?
Excellent step-by-step guide for winterizing an RV! The detailed instructions and visuals make the process seem much less daunting. Properly preparing your rig for winter storage is crucial to avoid costly repairs later. I’ll be bookmarking this article as my go-to reference.
So glad you found it useful Gary!
Should cupboard doors be left open?
Hi Paula!
I doesn’t hurt to leave cabinets and what not open just for airflow. If any moisture was in those area’s it could start to mold or create an unwanted odor. Hope that helps!
Found in step 2 detail:
“Once drained, turn the water pressure on and flush out the sediment for 2-3 minutes.”
Hi Brad, please see my reply to your other comment for clarity, but don’t hesitate to let us know if you have other questions about the process!
Why “Hook up city water to your RV with the water turned off” in step 2?
2. Drain and Flush the Water Heater
You’ll also need to get the water out of your water heater. This means you need to turn it off and let it cool down, and not be under pressure. Hook up city water to your RV with the water turned off. From there, you can use your socket wrench to remove the drain plug or anode rod and open the pressure relief valve.
This will let the water drain out. Don’t drain the water heater if it’s hot or has pressure built up. Wait until the temperature and pressure come down. Once drained, turn the water pressure on and flush out the sediment for 2-3 minutes. Remove the anode rod if old and leave it out during winter; make a note to install a new one in the spring.
Hi Brad,
The city water will be used to flush the water heater tank once it’s drained. Hooking it up with it off just means to leave the spigot at the city water connection off until the tank is initially drained. Hope that clarifies things, but let us know if you have any follow up questions!
Should I drain the antifreeze or blow it out of the lines or is the idea to keep the system full of fluid. Also some treads suggest undoing the lines in and out of the pump. Seems like it could get messy. I’m in Central Alberta so -40 is highly possible.
No need to drain.
Hi Joe,
You should definitely leave the antifreeze in the lines, but you’ll need the proper extreme duty RV antifreeze rated for those frosty temperatures. That antifreeze should last 2-5 years in the sealed lines. The water hear, fresh tank drain, and holding tanks should be left empty. When winterizing, care must be taken to ensure that the antifreeze is pumped through the city inlet, water pump, low point drains, outside kitchens, outside shower, shower heads, filter housings, ice makers, dishwashers, washing machines, accumulator, screen filter bowls, toilets, tank flushes, etc.
Winterizing isn’t the quick, simple job it once was. If you have any reservations, your local Camping World can provide a Complete or Deluxe Winterize for them. Here’s where you can find a service center near you: https://rv.campingworld.com/rv-service-maintenance#js-anchor-locations
I drained all the water out of the tanks then put three gallons of antifreeze in the fresh water tank. I turned on the water pump and nothing came out of the faucets. Where do people in the videos get the water that flows from the faucets before it turns pink if everything is empty?
My winterizing process is somewhat less complicated. Mid October, load up DPtag, hook up one of the Jeeps, shut down bricks’n’sticks, fuel up, take I-70 West to I-35 @KCMO, hang a lazy louie, set cruise on 70, out run the cold. Reverse process about April, or May, or maybe NOT. Easy, peasy, works every year. We don’t camp. We LUXURIATE!!!!!
There seems to be disagreement over whether you open a faucet or close the faucets after winterization. You said, close all faucets. Is it o.k. To leave a faucet or two open for possible expansion? Thanks!
Thanks this was very helpful.
What do we do to keep our RV from freezing during the winter when in use!! We use ours years around.
If I use an air compressor and blow the water out of my lines is it necessary to hook up to my water pump and run antifreeze through my lines. If I blow out the water and pull my water heater plug then run antifreeze down my P traps will I be ok,
I keep an electric heater on in my garage bathroom to keep pipes from freezing over the winter. Is it possible to do the same in the RV.
If all (or nearly all) the water has been drained from the system, why is antifreeze necessary? It seems like even if a little bit of water were left in the system somewhere, it would have room to expand in a mostly empty system.
Where is the switch to turn on and off the therma heat as stated in the owner manual? Class C forester.
I have food trailer with a 20gal fresh water tank, a 50 gal black water and an instant propane water heater. We will be using the water on several occasions maybe every other week or so but while it sits in between events how do we keep the water from freezing? Is this something we will have to do everytime we get ready to store it for a week a or two?
I might be camping in the winter if the temperatures stay above freezing. Is there anything I can do to prevent my pipes from freezing in between camping trips?
Can I winterize the tank and still go camping if I don’t use the water or toilet?
If i use an air compressor to blow all the water out of the lines, do I still need to put antifreeze in them?
What do you charge to winterize a thor ace 27.1
Hi Annamarie!
I’d recommend contacting your local Camping World service center directly: https://rv.campingworld.com/rv-service-maintenance
They can give you pricing and info on our two winterization packages!
Hi Judy! If water flows from the faucets before it turns pink (or the color of the antifreeze you use), that tells me there was still water in the system. That might not be a significant issue if the ratio of water to antifreeze is roughly 50/50. But some antifreeze bottles are pre-mixed (i.e., already a 50/50 solution). Did you use a pre-mixed solution or a 100% antifreeze?
Also, are your faucets and low point drains closed again before you turn on the water pump to circulate the antifreeze? If the system is open (i.e., a faucet or low point drain is open), it will be harder for your water pump to build pressure to circulate antifreeze. Feel free to follow up if you have additional questions. I’d love to make sure your RV’s plumbing is safe as we move through these winter months!
Thanks for sharing Scott!
You’re spot on about the possibility of residual water remaining in the lines when using air to blow them out. Antifreeze is a safe bet for long-term winterization.
Great call Joey!
I’ve personally taken this approach myself over the last few years. Do you ever head to any of these snowbird destinations?
https://blogcw.local/the-rv-life/where-to-go/unsung-snowbird-destinations-for-rvers/
I used air pressure for years in Virginia; my first two years in Colorado I lost waters pumps. The technician advised me that blowing out the lines leaves some residual water, even condensation from extreme temperature changes can freeze, expand and blow seals in the water pump. Anti-freeze is a cheap solution when considering the cost of replacing broken pumps. I also leave all the knife switches on the tank outlets open. Even when drained, condensation can build and cause freezing that will prevent the knife switches from opening/closing. (We take out our fifth wheel and the end of February and de-winterize that day before our departure for warmer climes)
I wondered the same thing. It works for our sprinkler system, and I wouldn’t think it would be difficult to do it. Drain the water lines and blow out the gray water drains. It might cause some issues with the gray water tank smell getting into the trailer past a cleared P trap. At a minimum, it would drastically reduce the need for antifreeze. Black water tank would have to stay with antifreeze treatment, so I guess that actually would fill all the lines anyway.
Hi Mike!
Great question. Let’s clarify:
If you do a basic winterizing, it’s okay to leave the valves open on the faucet and low-point drains. If you do a complete or deluxe winterize with antifreeze, it’s best to leave them closed, so they don’t drip antifreeze on the plastic sinks or shower pans. The antifreeze will get slushy but not freeze solid to be able to expand and crack a fixture. We’ve never seen damage from closing the faucets with antifreeze in the system. If the RV has been properly blown out there is no reason not to close the faucets, as there would be no water to expand and damage them.
Hopefully that clears things up, but let us know if you have additional questions!
What fo you charge to winterize class c 26foot.
Hi Gary, reach out to the service department, and they’ll be able to give you a quote! https://rv.campingworld.com/service
Yep! The storage space underneath the RV is often called a basement. This is where I’d put a small space heater if the plumbing runs through there (most of the time it does). It really depends on the unit. Some travel trailers won’t really have a basement like a motorhome or a fifth wheel.
What do you mean the basement of my RV? Do you mean underneath the RV?
Hey, Paul. Yeah, you can use a small space heater in the basement of your RV that should help keep your pipes warm enough to keep from freezing. Also, there are heating pads you can add to your holding tanks.
Hi Warren, I’m not familiar with your particular model. I’d say give the nearest Camping World dealership a call. They’ll be able to help you out
Hey Don, If the RV is in freezing temperatures you may have to or find a way to keep the tanks and water lines warm. You can buy heating pads for your tanks that should help keep them from freezing.
Hi Sue, if you’re not actually using the water system I would think you’d be okay. The other option is to get heating pads for the tanks and make sure the lines and tanks never get cold enough to freeze.